Good morning! Wow! Between school activities, work and doctor visits, autumn and Christmas have flown by! I can’t believe it is 2019 and the holidays are over already! I was sad to take the outside decorations down, but hopefully, this project, an Outside Nativity Stable will help you get ready for next Christmas!
With such a hectic fall, I was extremely thankful for the finished Christmas projects from my Year Round Christmas Challenge. You wouldn’t believe it, since the projects are always a few days late (or missed – poor September and October), but I really enjoyed the challenge.
Since I only worked on one Christmas project a month, and posted it on the 25th, I was not overwhelmed. It was fun thinking of Christmas projects and having time to do them. Usually, I resist making red and green projects before Thanksgiving. But this year, I was thankful that wrapping paper, glittery gift tags and festive napkins were ready for use. I was even happy for my candy food flop! It flopped in the spring, not the night before I made cookie trays in December.
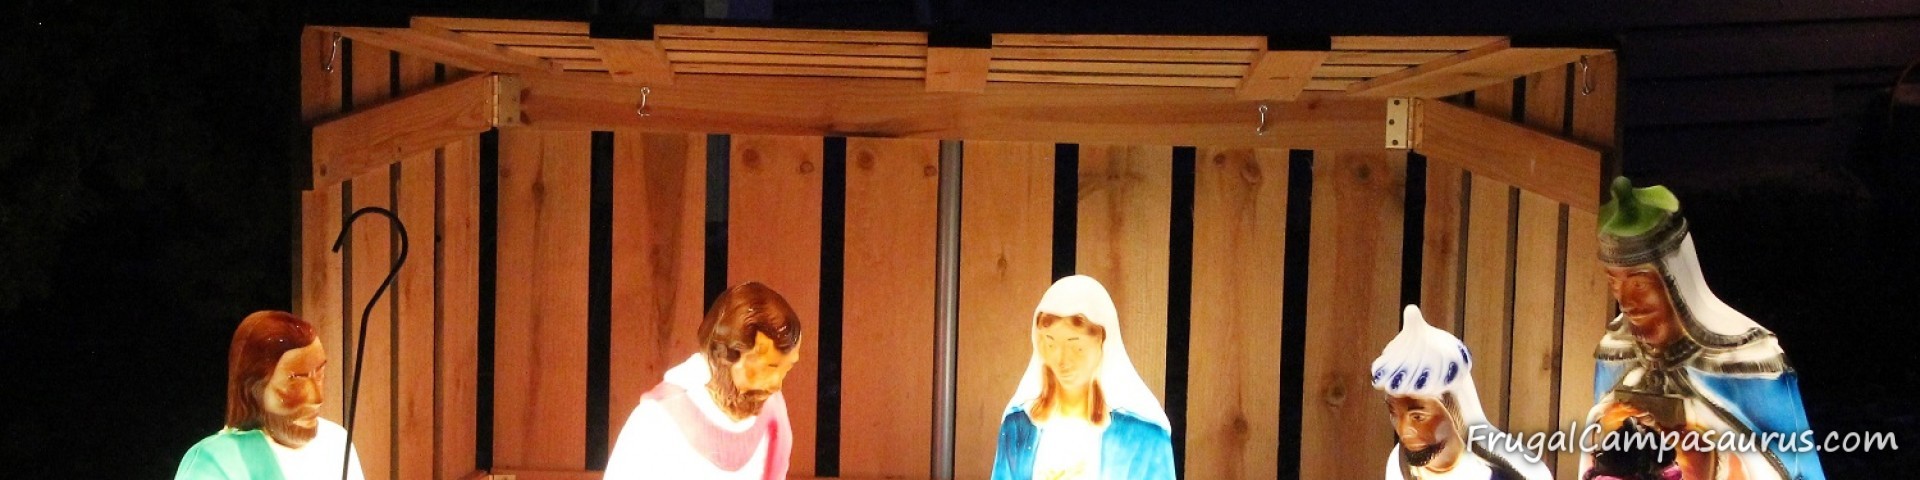
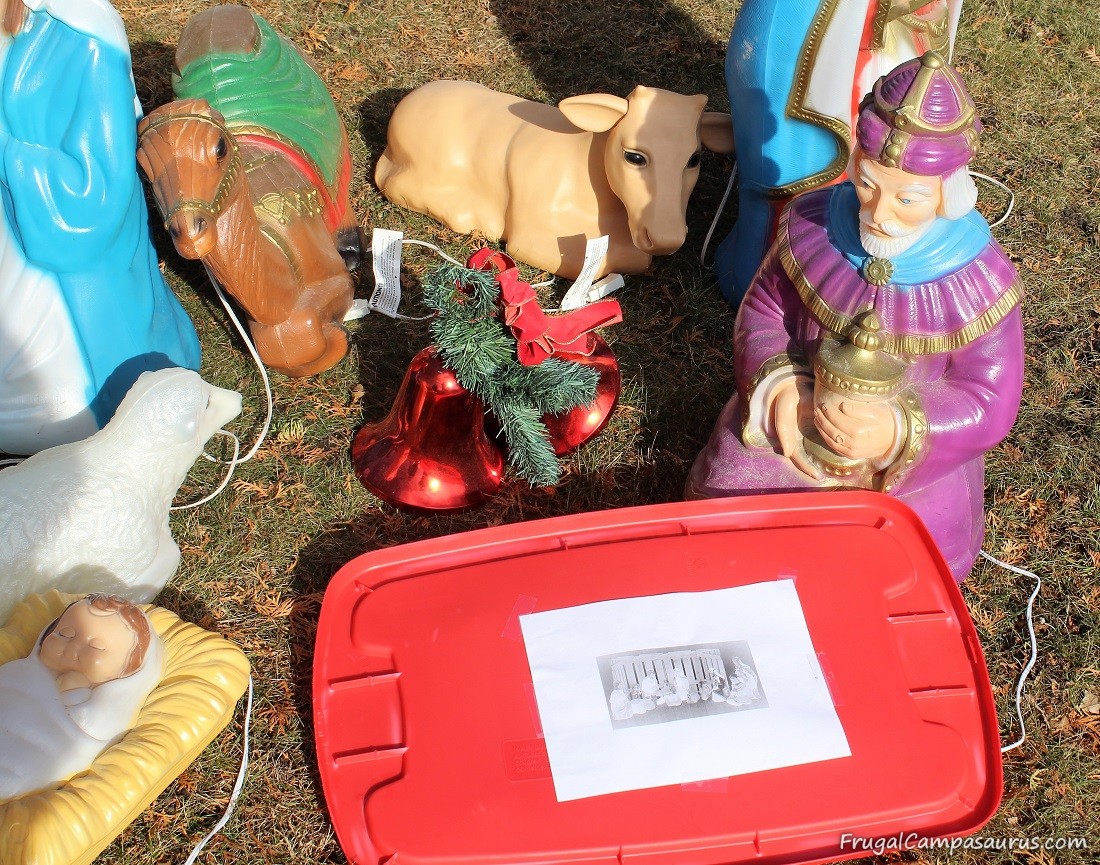
I was glad that the Outside Nativity Stable was built a few years ago and also ready for the holidays. I was sooo excited when I got a blow mold nativity scene. It is my only outside nativity, so I was happy when the husband built a stable for it. It was the husband’s Christmas project, but I love it and hope it inspires you to work on Christmas projects!
The stable needed to be frugal, easy to move and easy to store.
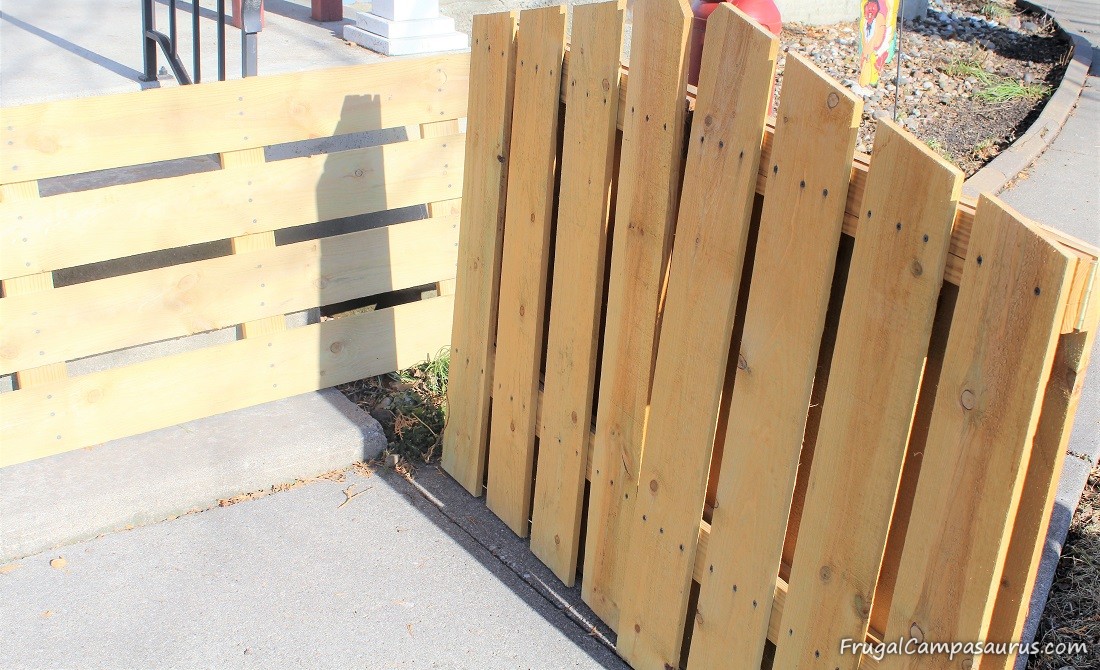
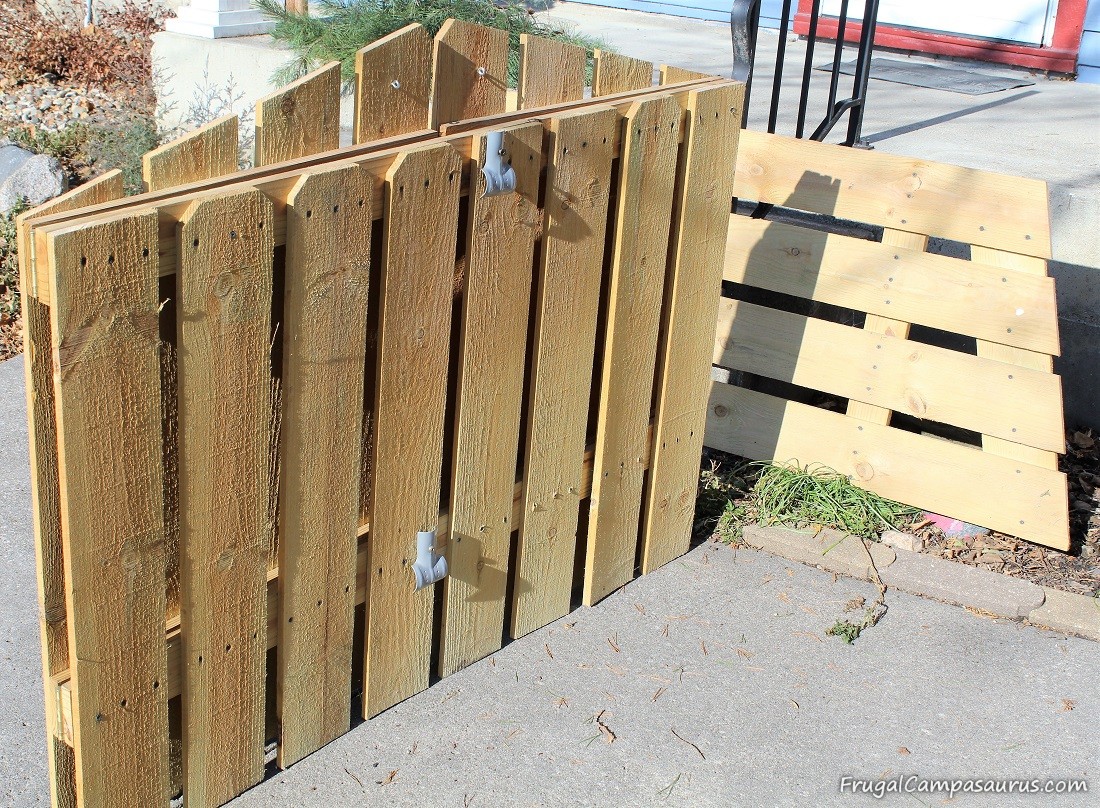
My old elbows cannot help the husband move heavy things anymore. Thankfully, he built the stable to come apart. The roof detaches from the base, making it lighter. The walls also fold in, making it easy to store.
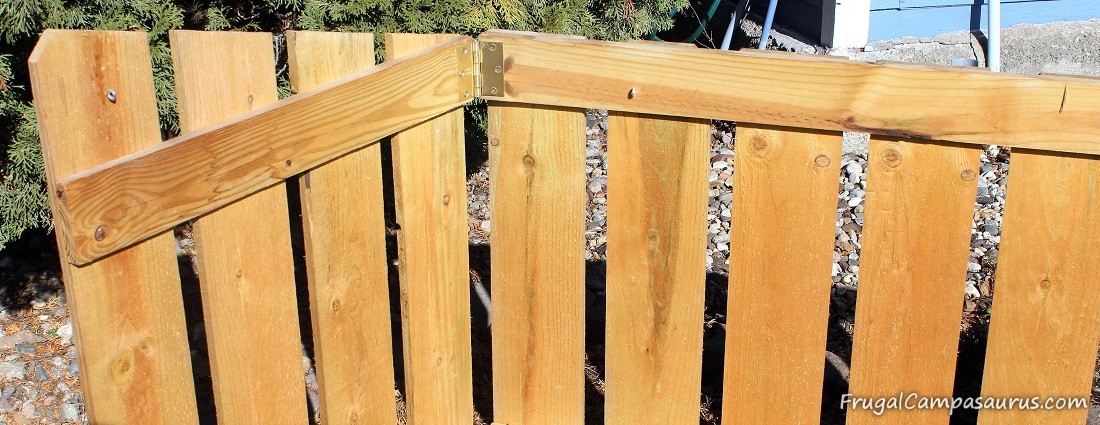
It is built using 16 -1 by 6 dog eared fence pickets. They are inexpensive, and sometimes on sale, at Menard’s. 1 by 4s are the supports for the pickets that make up the walls of the stable. There are two rows of supporting boards to hook the picket fence onto . This is also where the hinges for the 2 side walls are attached.

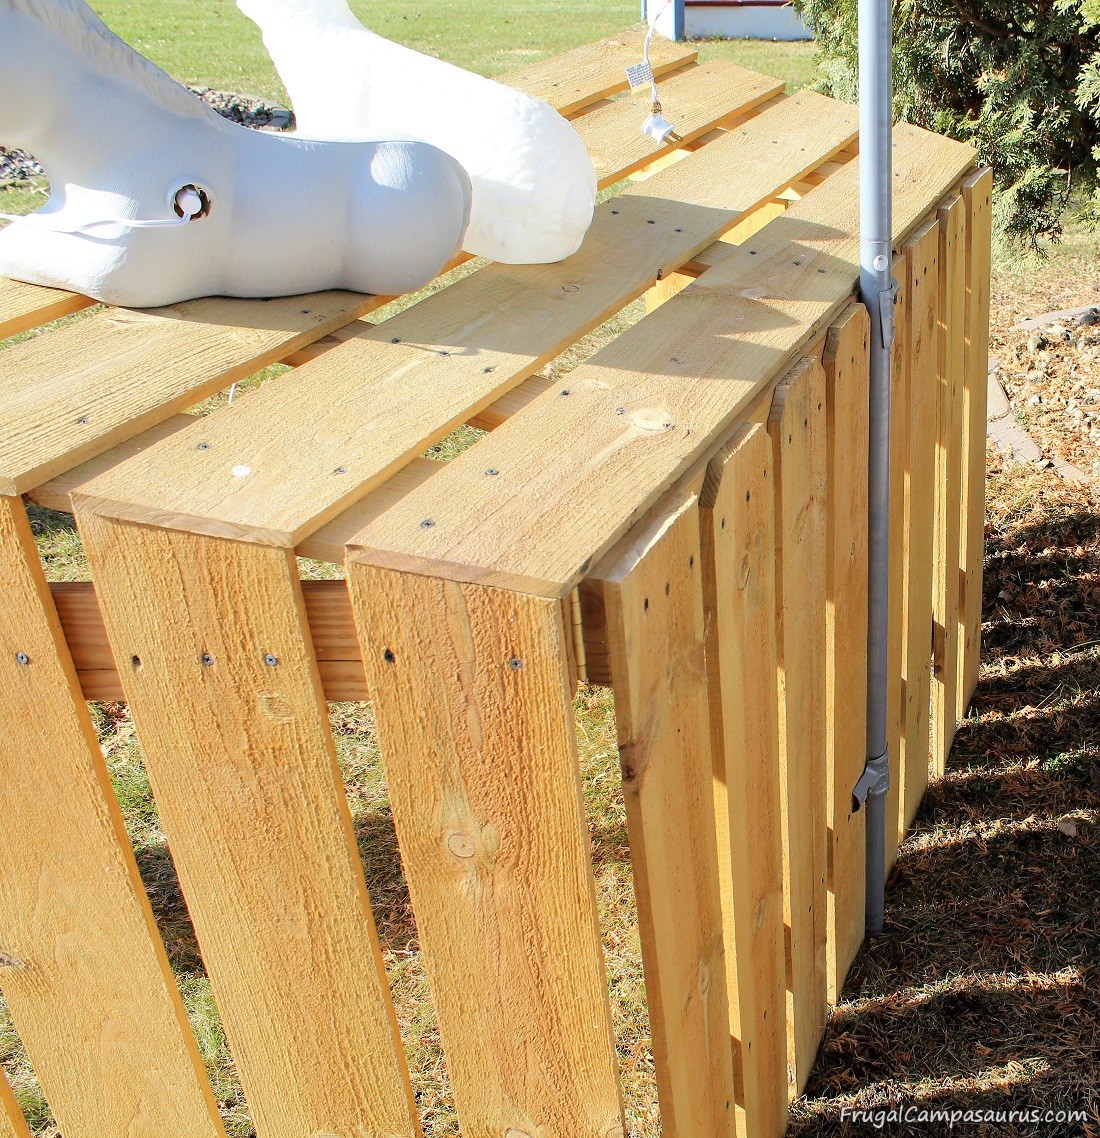
Above is the stable roof, detached from the walls. It also uses 1 by 4s for support, though the two end supports are leftover picket pieces (love being frugal or maybe we ran out of 1 by 4s? I can’t remember). The front edge is a whole 6 foot picket, while the back edge is only 58 inches in length.
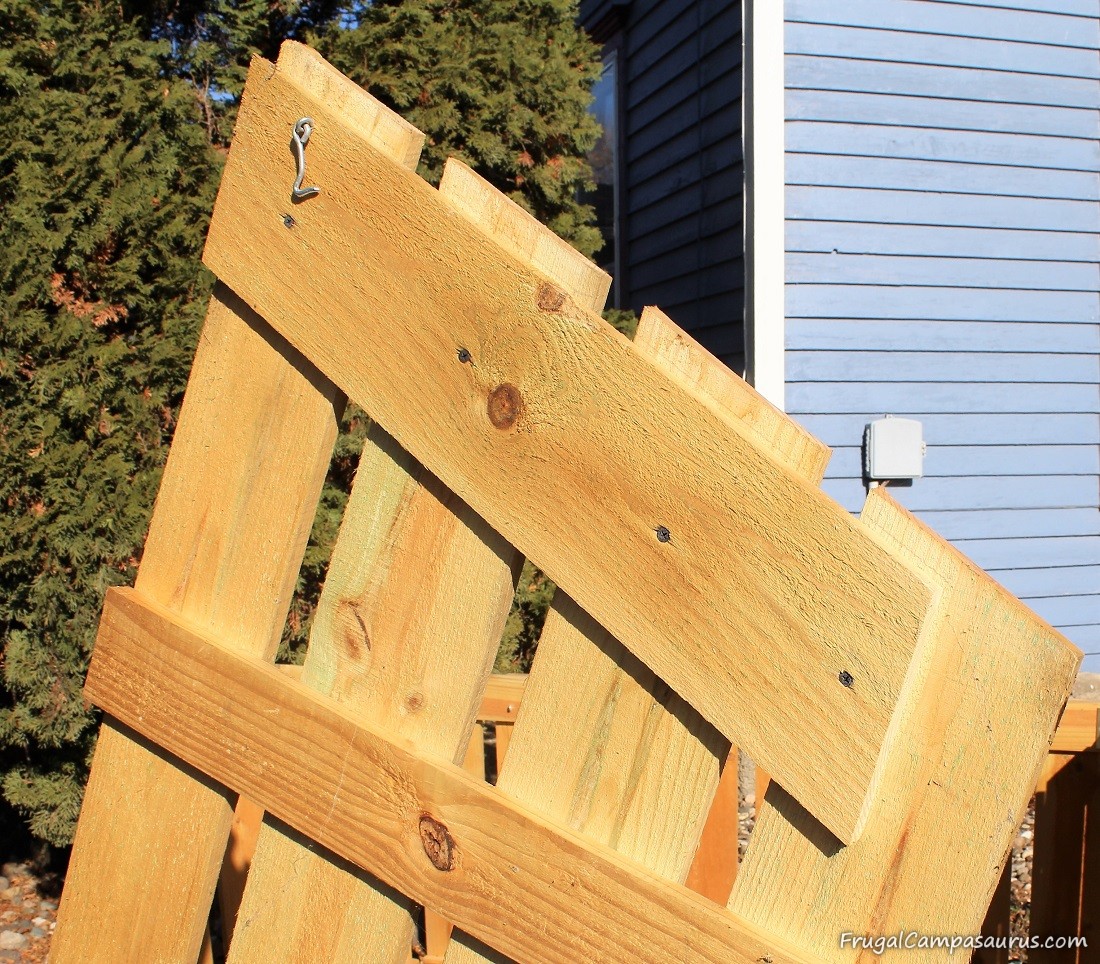
The 1 by 4s need to be set in on the back and sides, so the picket fence roof can rest directly on the walls.
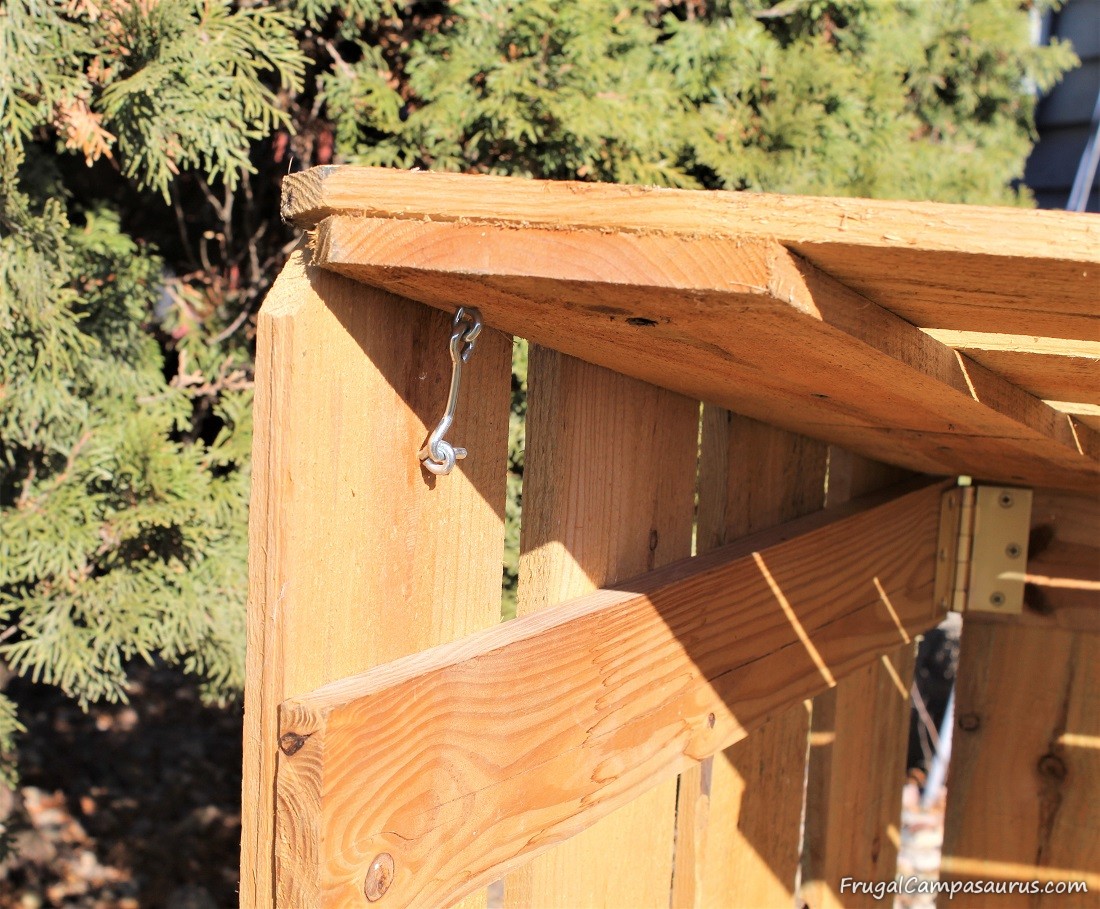
The four eye hooks, one on each inside corner, hold the roof on the stable. It holds pretty good, the roof has not blown off in the wind- though once the whole thing blew over backwards!
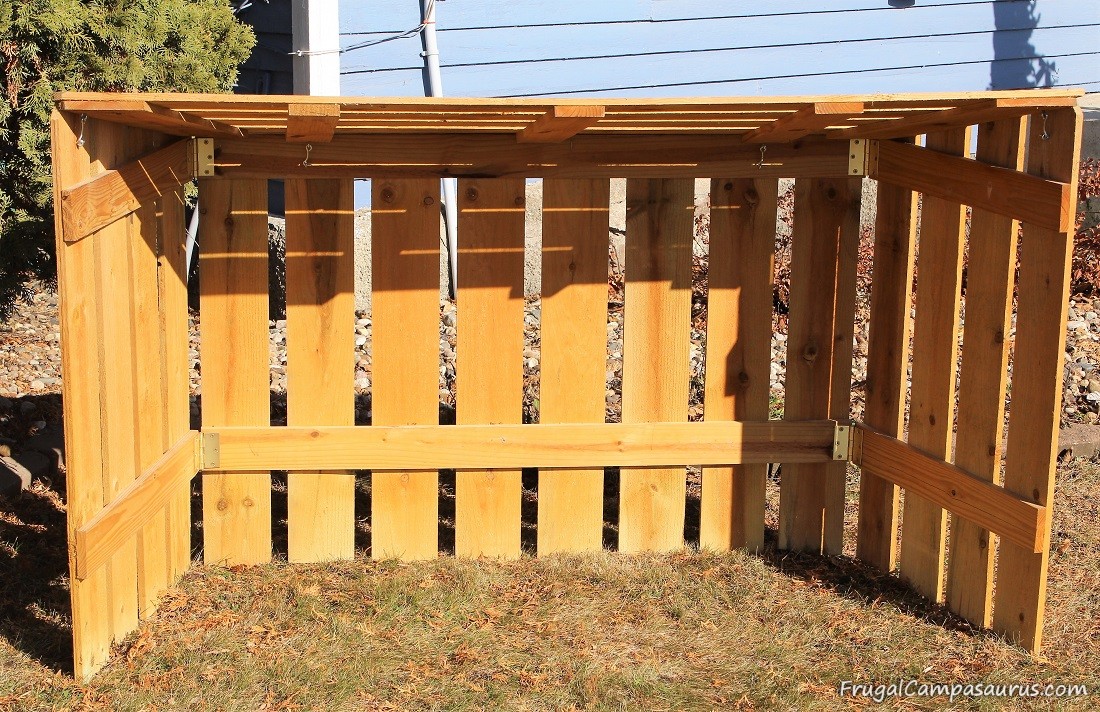
The back wall measures 54 inches in length. 4 fence pickets were cut in half, and spaced with about an inch gap in between. The angled side walls help to give plenty of room to set up the nativity scene. The gaps in the walls allow the electric cords through, though the main reason is to let the wind go through and not knock over whole stable.
You can see the top sections of the dog-eared fence on the back wall, but thats ok. There are also 2 clamps from an old broken awning. The husband tightens and loosens them every year to hold the pole. Probably a bent clamp or scrap of wood could be used instead, especially since the gap in between the pickets was made large enough to nestle the tent pole in.
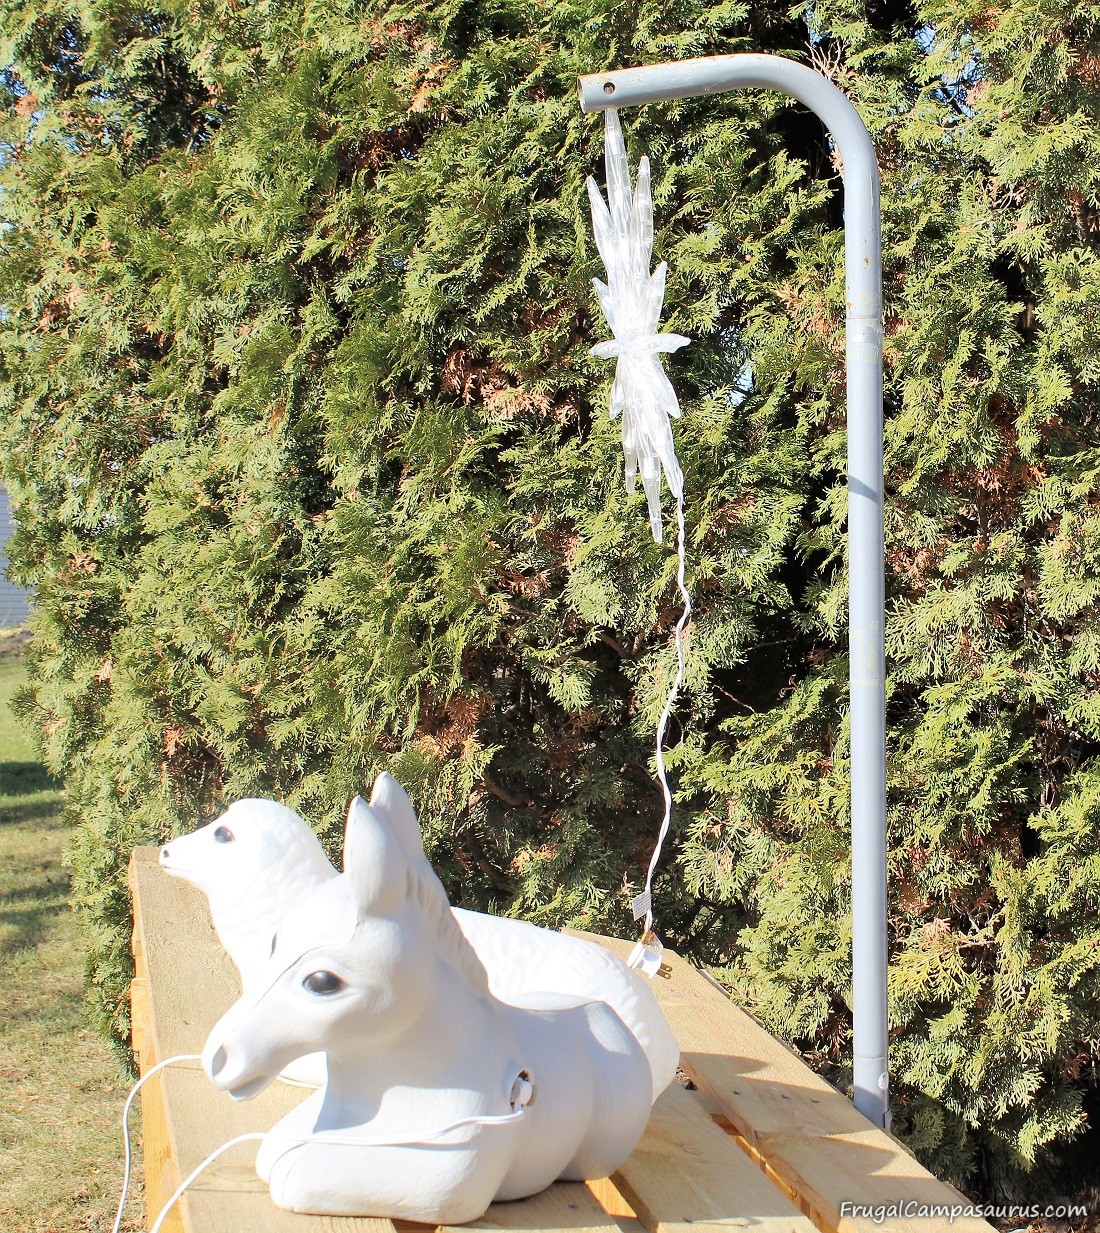
We have tried hanging the star on the tree and on the house, but I like it better attached to the stable. The pole is an old tent pole or awning pole (I keep telling him that saving everything is a GOOD idea).
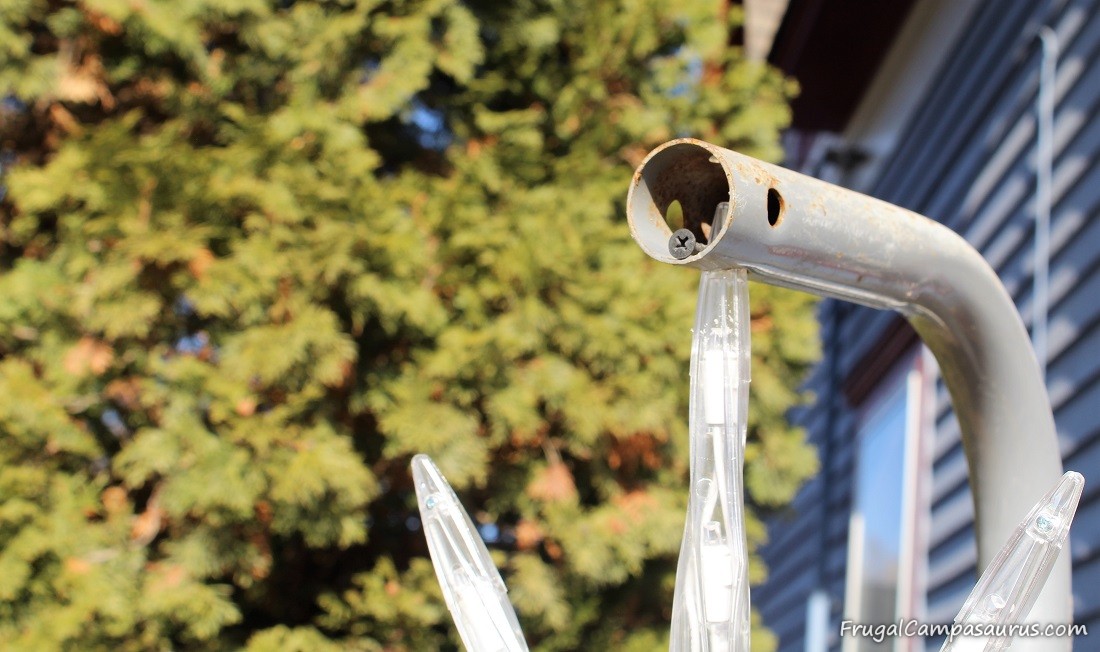
We hang a star using a screw inside the tent pole. The husband drilled a small hole in the top of the star . It has broken in the wind, so it is still a work in progress. I keep telling him we could wire it up, but he’s not convinced yet.
Silly animals are resting on the stable roof. They have a nice view of the star, until I move them.
I love nativities, but did not have one for outside. Nativities are always on my garage sale ‘to buy’ list. It is so fun to collect them. One Christmas, my niece decided to count my inside nativities- I think she lost track around 30.
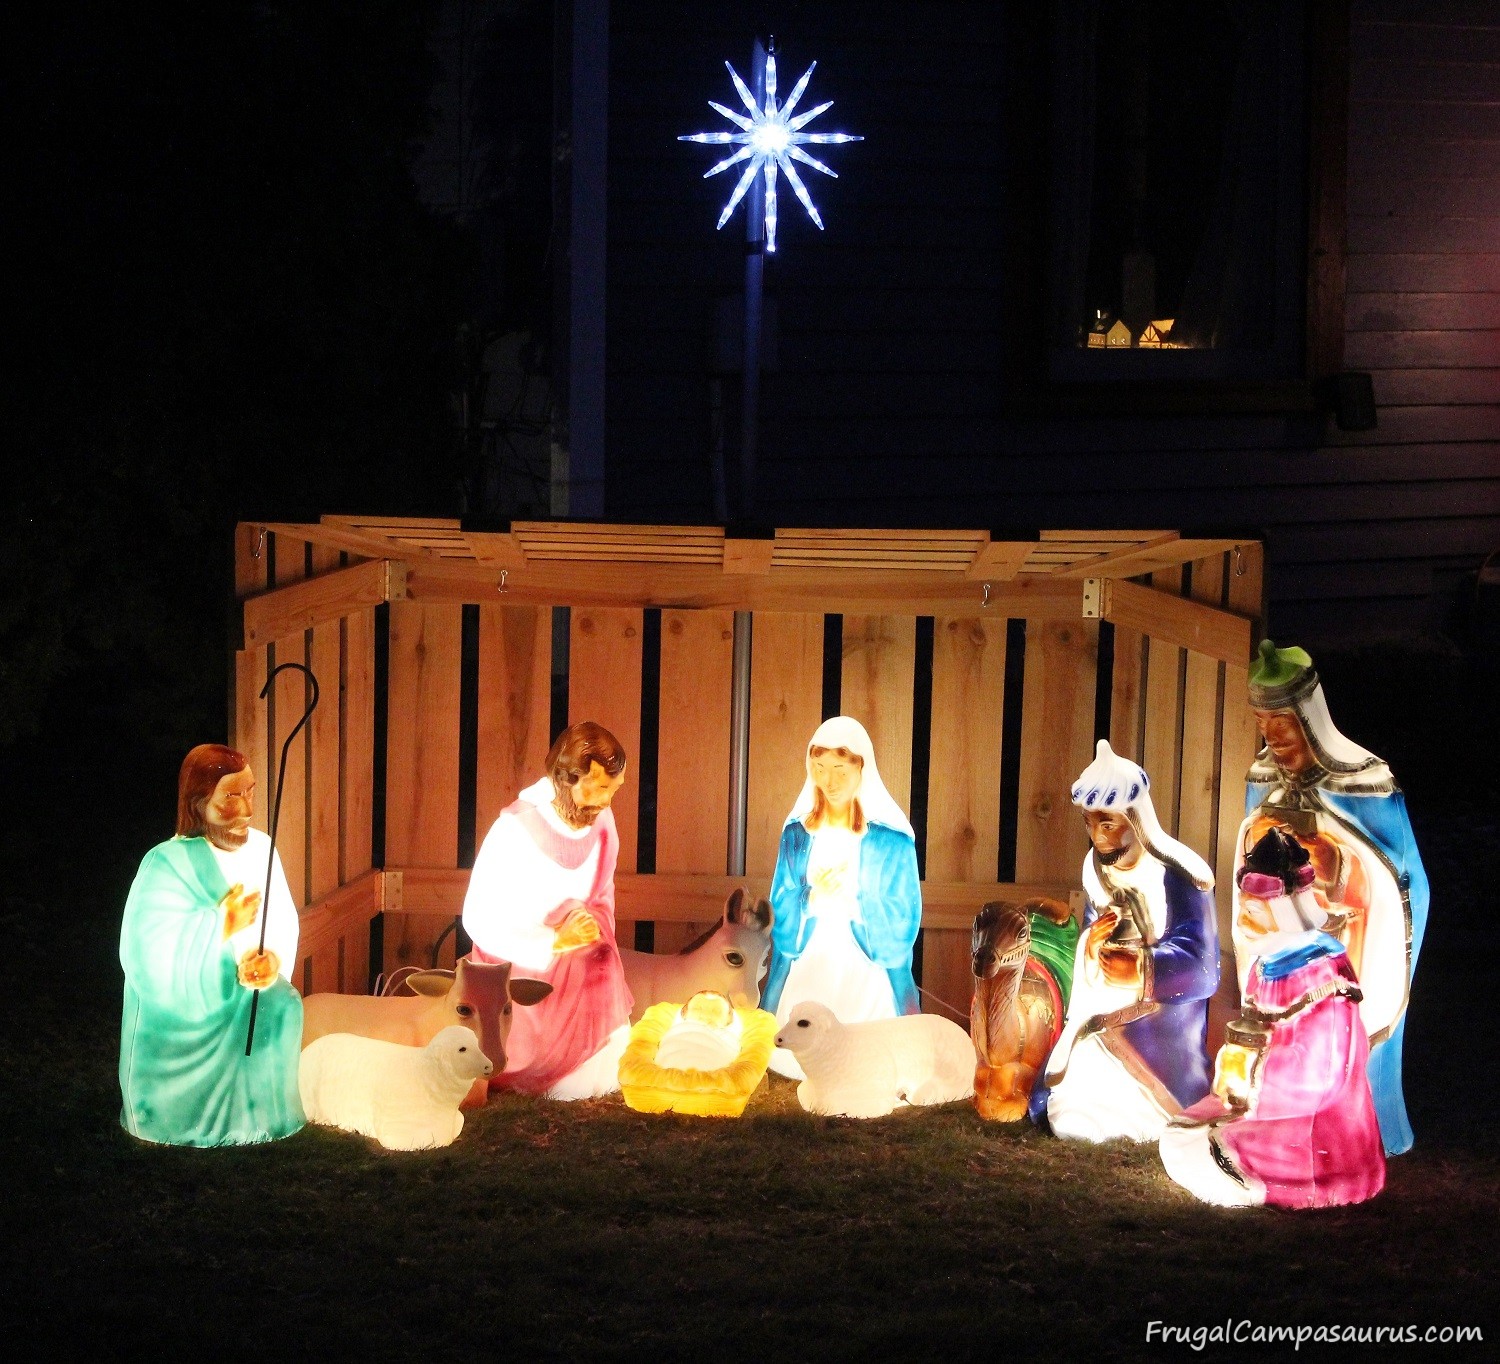
I really enjoy the outside nativity and I am so glad this stable was frugal and easy to make. I love that it is easy to store and get out again each year when it is finally time to decorate for the holidays.
I hope you are inspired to get something ready now, for next Christmas. I appreciated having projects finished and ready to use so much, that I will be continuing the Year Round Christmas Challenge again this year. I hope you will join me each month on the 25th as I make presents and decorations and try new recipes for the holidays!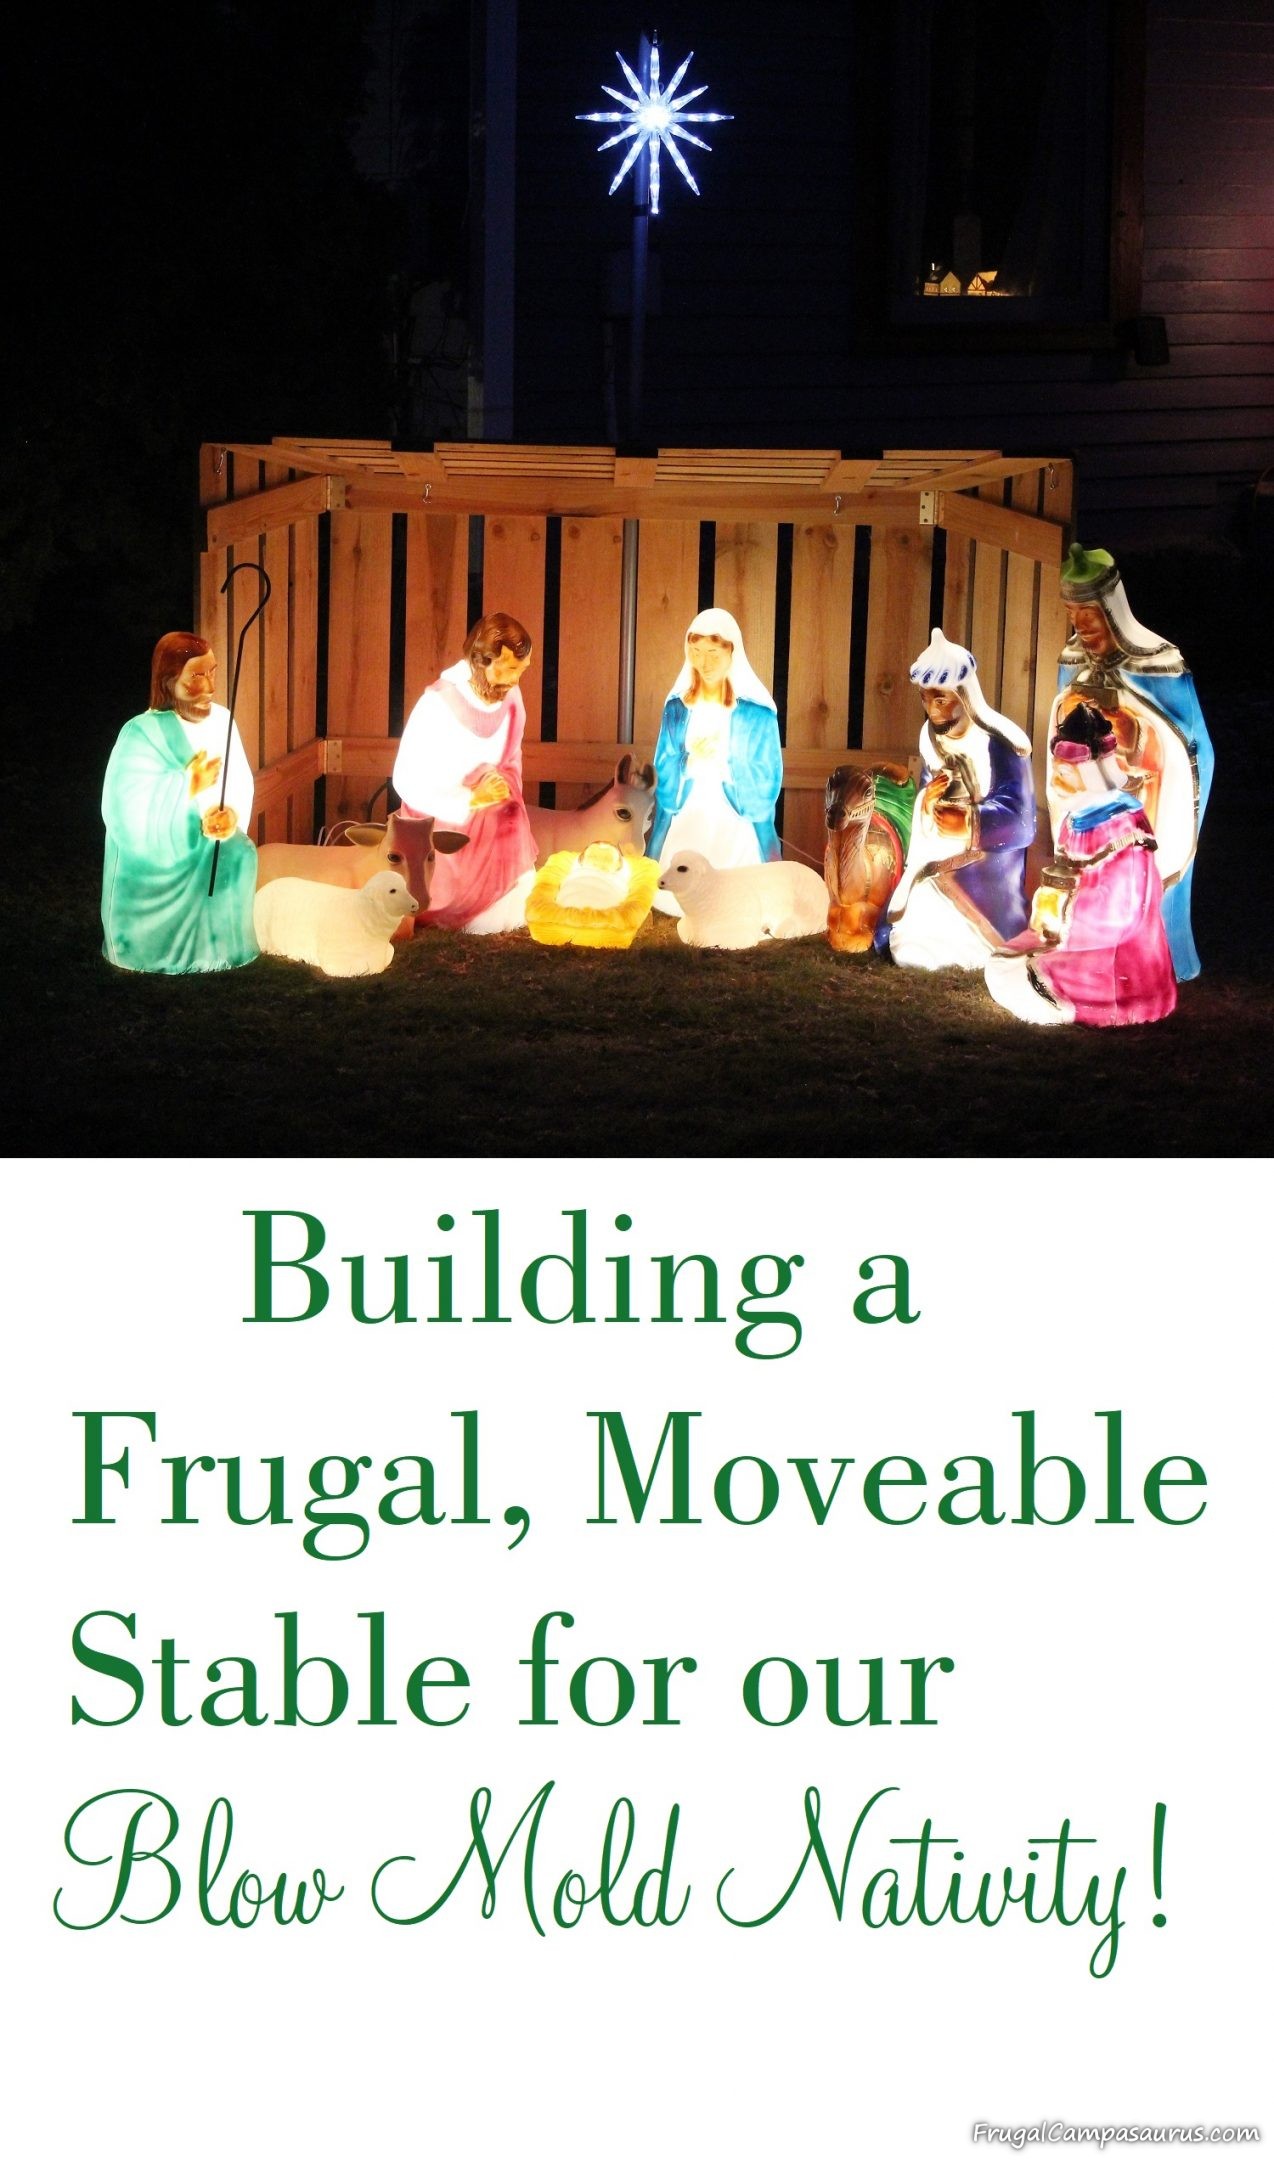
Happy Camping (or searching for more nativities!)
Frugal Campasaurus
Here is a parts list as requested by Robbie.
16- 1×6 by 6 foot tall dog-eared fence pickets
4- 3 inch hinges
4- 1 1/2 or 2 inch long hooks with eye hook part
lots of screws
1x4s were used for the structure: Back used 2- 54 inch long
Sides used 4- 26 inch long(2 for each side)
Roof used 3- 26 inch long
Roof also used 2- 24 inch long scrap pieces of the picket fencing (I think we ran out of 1x4s)
The roof supports are flush with the front edge, but set in at the back and sides, so it could nestle with the base.
How tall is the inside of the stable?
Near the back wall, it is 3 ft high. Since the side walls are angled upward, it is 42 inches high at the front.
What size of screws did you used
We probably just found leftover screws in the shed that didn’t stick all the way through, but I would guess 1 inch.
Thanks for sharing. Used your foldable idea. My dimensions are a bit bigger so I can fit all the characters inside, and made it taller to hang the star inside. But, loved your idea on the folding aspect. Again, thanks for sharing.
You’re welcome! I’m glad the folding idea helped you make your nativity stable!
Would you be willing to email an exact part list needed? Thank you
I updated the post to include a parts list at the end. Hope that helps, please let me know if you have any other questions-it is so easy to use, I can’t wait to put it up this year!
Do you remember what size wood screw’s you used ? Thanks
No, I’m sorry I don’t remember, but I’m sure we would have used anything we found in the shed that didn’t go through.
How wide is that roof in front vs. in back?
I’m debating whether or not I want to take the time to try to build this, based on your instructions… or just pay for the smaller pre-made one at Menard’s / on their website…for $80.
For the roof, it is 58 inches along the back edge and it is a full 6 foot picket along the very front edge.
We made a larger stable, so most of the figures would fit inside and not blow away. We also filled large baggies with sand and set them inside the figures, to help them not blow away.
They don’t have it anymore. I tried to buy one from the Louisville menards and they didn’t have them in stock even though their site said they did
The Menard stables are crap. A piece of leather holds the sides together. I’m going with hinges like the directions have Hope it makes the thing sturdier.
We have used it for many years now and have not had any problems. Hope it works well for you, too!
How tall are the fence pickets on the back wall
They are 3 feet tall.
I like this! My hubby will be doing one for next year to enclose our daughters Holy Family. Thanks for including some salvaged parts as well. Have a marvelous New Year!
Thanks, I’m glad you like it! I hope you all have fun building it and have a Happy New Year, too!
Do you remember what angle and length of the sides that attach to roof.
The side walls go from 3 foot high at the back to 42 inches at the front. If you mean the supports that attach to the roof, they are just scraps- as long as the scraps are set in so the roof rests on the walls- all is good.
To keep it from tipping backwards in the wind, put an eyelet screw on each front end at ground height then pound a tent peg through each eyelet into the ground.
What a great idea! Thanks!
Thank you so much for posting this! I have been wanting a stable for my blowmold nativity for a couple years. Been really looking last year and this year to buy but no one around us sells them. I came across this site the other day and today my hubby and I got the supplies and worked on it today! It is 98% done just need to cut the angle on the roof and install hook and eyes…I am soo excited to get it out front around my nativity!! Will post a pic when done If I am able! Thanks again!!! Now I just need to add onto my set
Glad you found it- and that it’s almost done! I can’t wait to see it!
Thank you for your post. I have the same nativity set and have been looking for a nice stable that wasn’t too expensive. It’s probably too late to make it this year, but it’s definitely on my to do list for next year.
I’m so glad you found it! I just love the outside nativities, and the stable is easy to build.
MUCHAS GRACIAS POR COMPARTIR SU IDEA CON LOS DEMAS ESTA MUY LINDO EL PESEBRE NAVIDEÑO.
Thank you, I’m glad you like the nativity stable.
Hi, I just did my stable following your instructions. Had a little hit and miss but I think I did well. I used a 3/4″ PVC pipe for the star’s stand and cut a hole of the same size towards the front and attached a screw underneath to hold the pipe in place.
Thanks for your instructions, it was very helpful!
You’re welcome! The PVC pipe is a great idea!
It cost me $99 for all the parts at Lowes. I also am using PVC pipe for the star. Gonna start putting it together tomorrow. Thanks for the idea..
Where do you get the nativity set with the large figurines?
They were a present, but I think the husband ordered them online, it has been several years and he doesn’t remember where. Sorry.
They are no longer being made. You have to buy them used on EBay another online site. They are very expensive now unless you happen to come across someone how doesn’t know the market. I was lucky and walked into a Thrift store and their where just putting a complete set out and had it mark $24.98 .I couldn’t get in my cart fast enough. I had been looking for a set for years but wasn’t willing to pay $600.00 used. Keep your eyes open and hit the thrift stores.
Thrift stores and auctions are a great way to get them, but I have seen them new in some stores and online still.
Thank you for this post…it’s exactly what I needed to complete my nativity display! Between the post and your responses to questions about measurements, my friends (with basic carpentry skills) and I had it completed in just under two hours. The star is suspended in a tree about 15’ off-center behind the manger so the goal was to have an angel elevated above the manger using the PVC pipe suggestion; but it can’t be attached in the same fashion as the star. The solution was a metal bird feeder tray with a 1” flange secured to the bottom of the angel. The flange was too thick for 3/4” PVC but it’s doing just fine with 1/2”. Using eye hooks to secure the manger to the ground was also a great suggestion from a reader. Adding cedar boughs to the exterior gave it a finished look. So far it’s held up through 60/kmh winds and I’ve received many compliments on the display.
I’m sooo glad it worked for you. Your nativity sounds pretty, especially with the angel.
Love this stable. We just got our blow mold nativity this year.
Please tell me where you got your star. They’re hard to find.
Sorry I didn’t get to reply earlier, we bought the stars at Menards.
Hello where did you get the led star. Thanks
We found it at Menard’s at Christmas time.
I found this on google. Your design is very similar to what I was thinking but yours helped to clarify our plans. We made ourselves very similar, but my carpentry skills are not as good as your husbands. We especially liked the idea of using hinges. Although we used strap hinges instead. One change we made was to change the direction of the roof boards to go front to back with the slant. I also butted the boards to provide a good roof so the snow and water would roll off. My wife is thrilled! She got a new nativity and I promised to build her a stable. Thanks for posting such a great idea!
You’re welcome! I’m so glad she’s thrilled, I love our outdoor nativity also!
I just finished building this today and wanted to thank you for posting this.
I need to store this in the garage for 11 months out of the year so I loved the fact it comes apart.
I am no woodworker by any means, but I was able to put this together square and flush. I am in a snowy climate, so I added a base of 2x4s with 1x6s strapped across. I added 2×2 posts to each end of the back and 1 2×2 to each side. I screwed 2×2 flanges down to the base for the posts to sit in.
This is a solid and easy to make design. Much appreciated that you shared this.
I’m glad it helped! Your nativity stable sounds nice and sturdy.