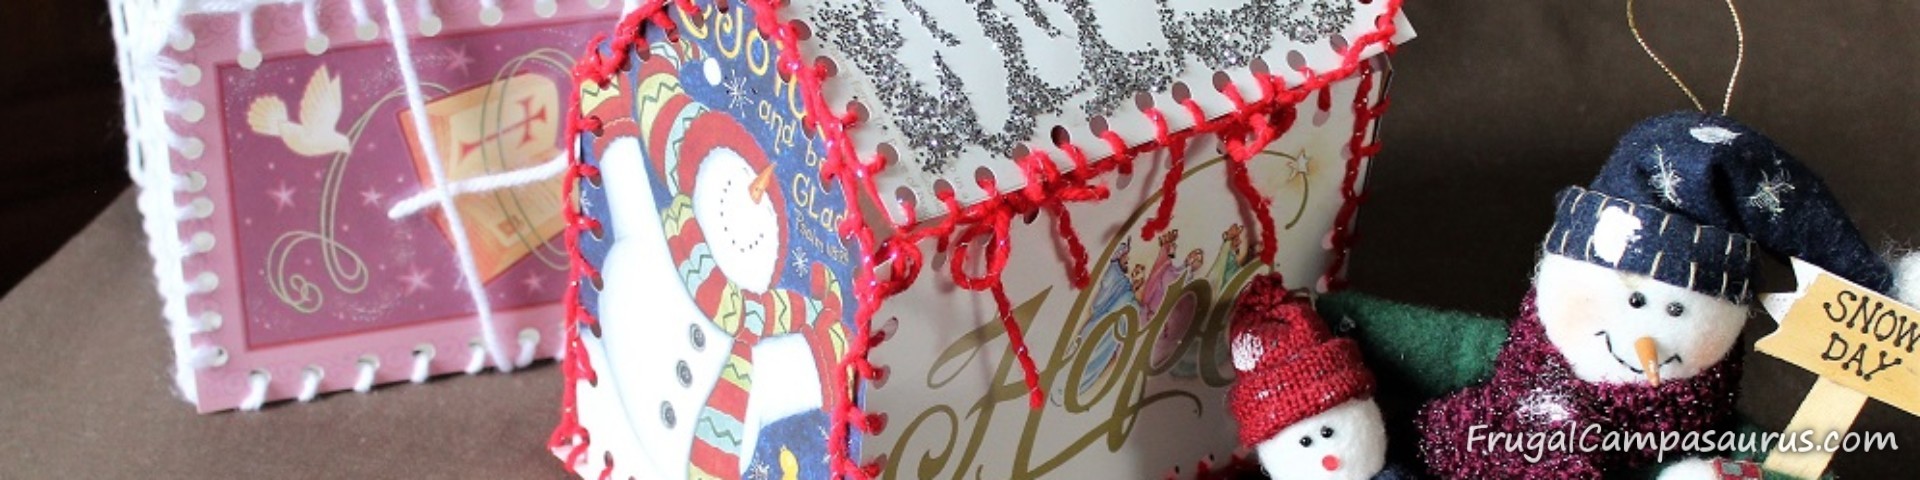
It’s a Fun, Fun, Fun Friday- Christmas Edition! Good morning! Since the 25th was so close to Friday this month, I decided to do a Fun Friday project for the Year Round Christmas Challenge. I’m so excited to share this Christmas project, Recycled Card Gift Boxes. It was fun, frugal and glittery!
While we are definitely a wrapping paper family (I love watching the kids rip open presents), I use a few Christmas gift boxes every year. I do reuse large pieces of wrapping paper, but gift boxes are more durable and I can reuse them for many years.
My favorite gift boxes are from an after, after Christmas clearance. The boxes had an enclosed window on top with shake-able trees and snow (no glitter), but lots of fun! Even though they were only 25 cents, they have really lasted well. Only 1 or 2 of the gift boxes have broken, but I am almost out of them because they are being reused by family and friends who also thought they were fun.
I’ve been thinking about buying more gift boxes, but saw some cute ideas while looking for easy Christmas gift tags. There are cute baskets made from recycled Christmas cards, and I vaguely remember a 70’s(?) craft that used the same idea to make gift boxes.
So,I tried a few variations and ended up with a very cute (and glittery) Recycled Christmas card gift box!
Not all of my ideas worked. Crocheting didn’t leave enough room to open the side walls. And while pushing the needle through the cards was easy, the paper punches looked tidier. I also didn’t want to edge the cards and then sew them together, so at least it worked to blanket stitch the cards together.
In making my example, and then a cute ‘keep’ gift box, I learned a few tips to share along with the directions.
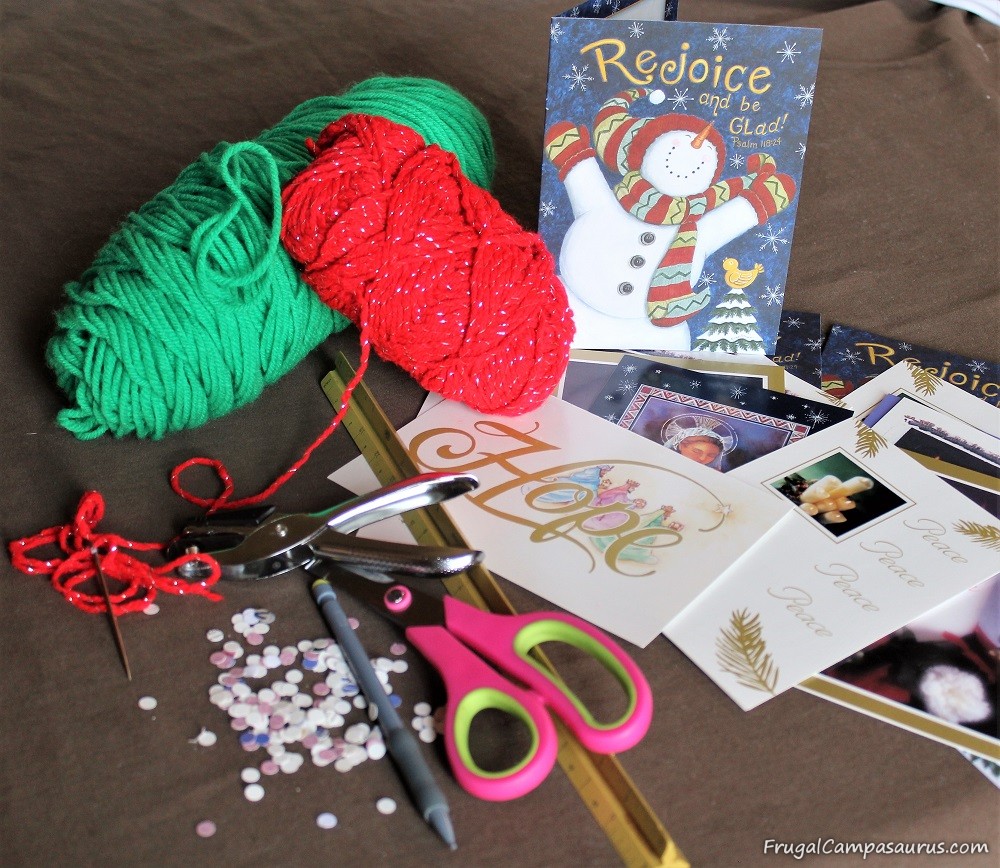
Materials:
Tapestry needle– I have a craft needle with a big eye for yarn, it works great for tying quilts also. A blunt one would work great with older kids.
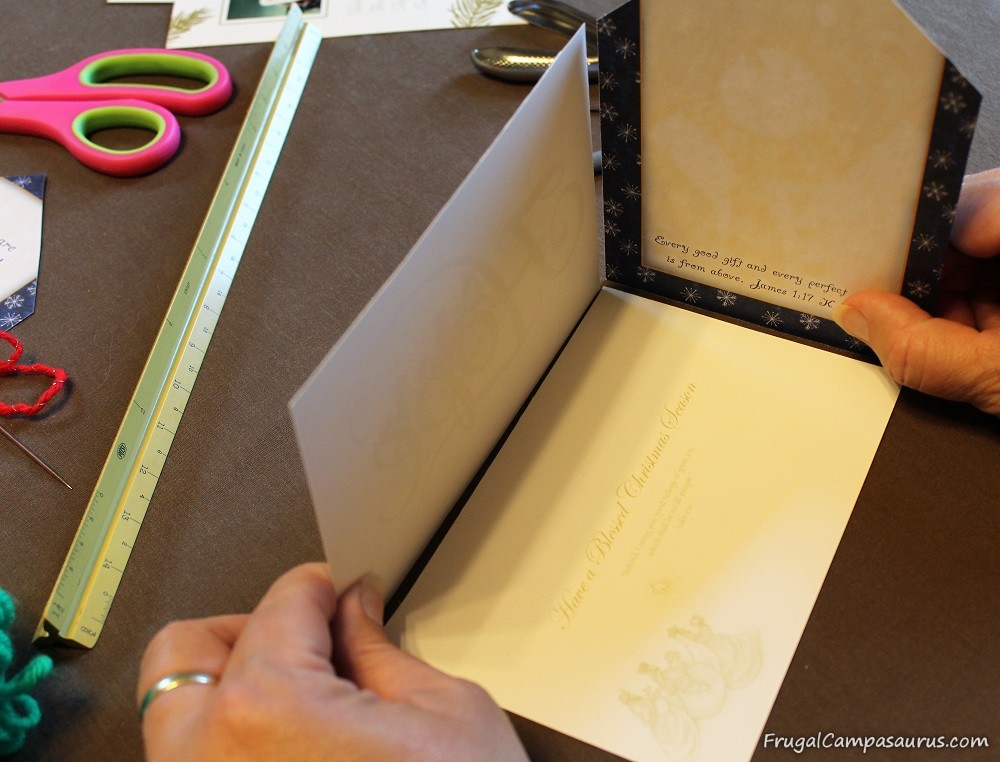
3-5 Christmas cards-Recycled ones are great, but I did use a few new ones. I used the insides for the roof and base of the house, but you could use front for different designs.
Paper punch, scissors, yarn, ruler, pencil
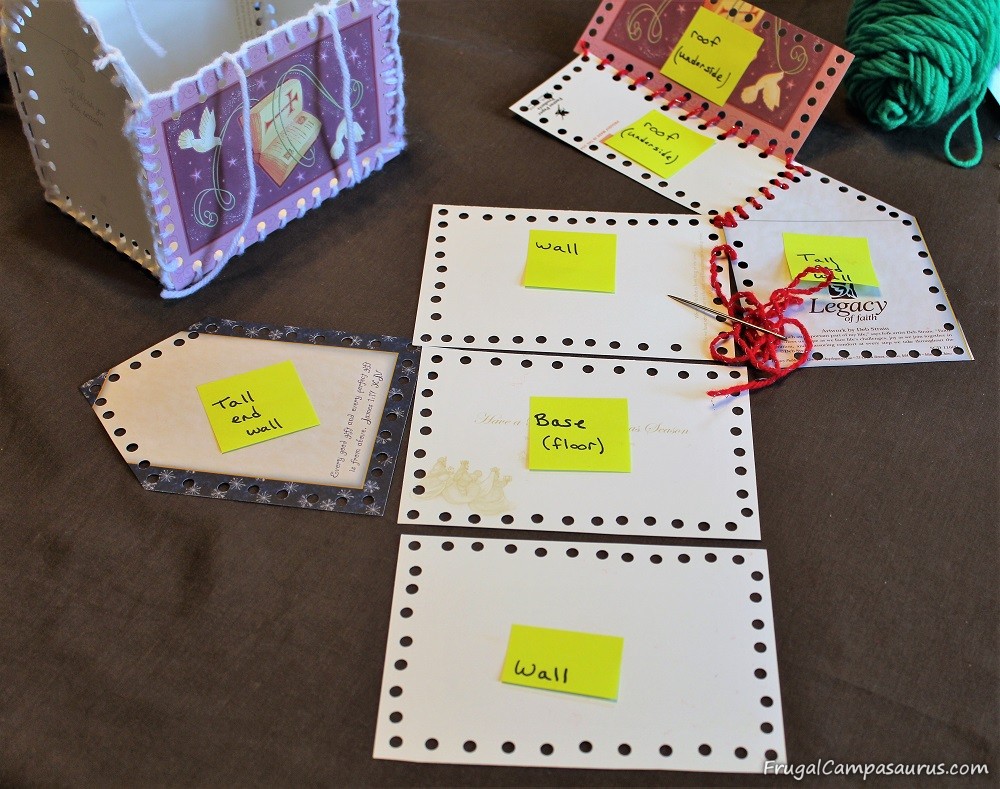
Cut the cards so the base and 2 long side walls are the same size. The 2 tall end sides need to be as wide as the base.
The straight parts of the 2 tall ends need to be as tall as the sides.
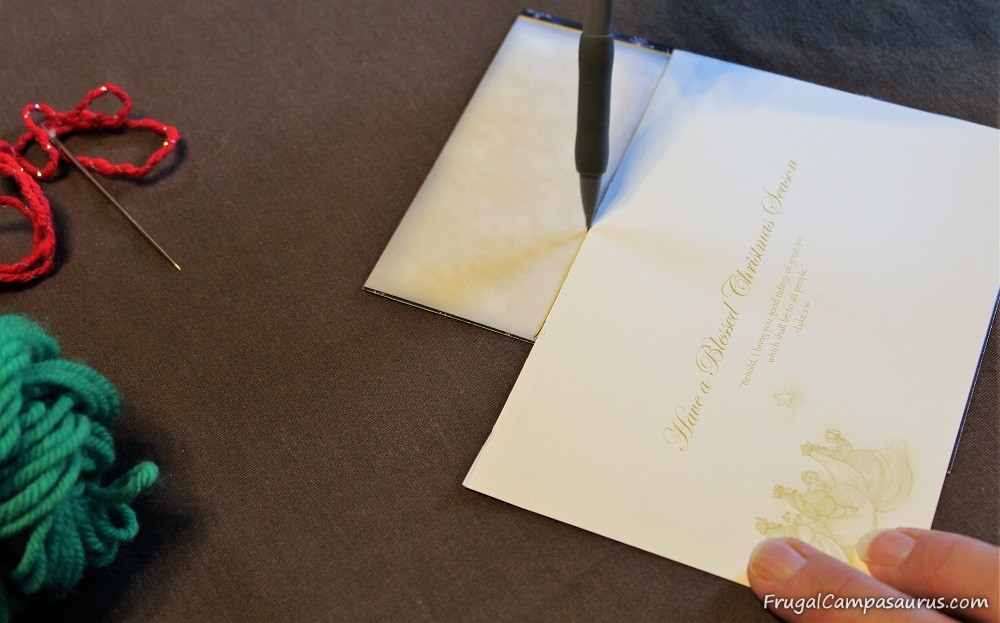
Just lay one of the side walls on a tall end piece and mark the height, make sure to write on the inside of the card. This is where the angles start for the roof.
Then, lightly crease the top of the card to find the center- I like to avoid rulers and measuring as much as possible! In the above picture, you can also see the pencil line that marks the straight side height.

Draw a line connecting the center crease to the outside edges of the height line. Then cut off the triangles to finish the 2 tall end walls of the house.
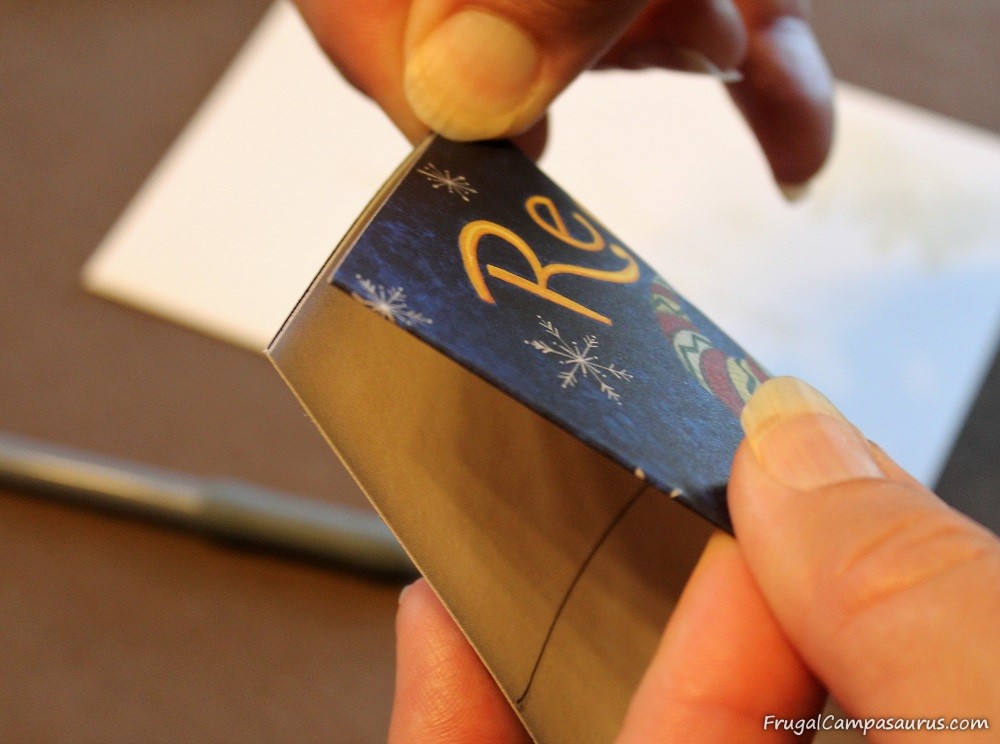
For the 2 roof pieces, cut a piece the same length as the base and side walls, but only as wide as one of the angles on the tall end piece. I did use a ruler, mark it and then cut it. On my pretty, finished gift box, I used the inside white part of a card so it would look like a snowy roof. When I was all done sewing, I added silver glitter!
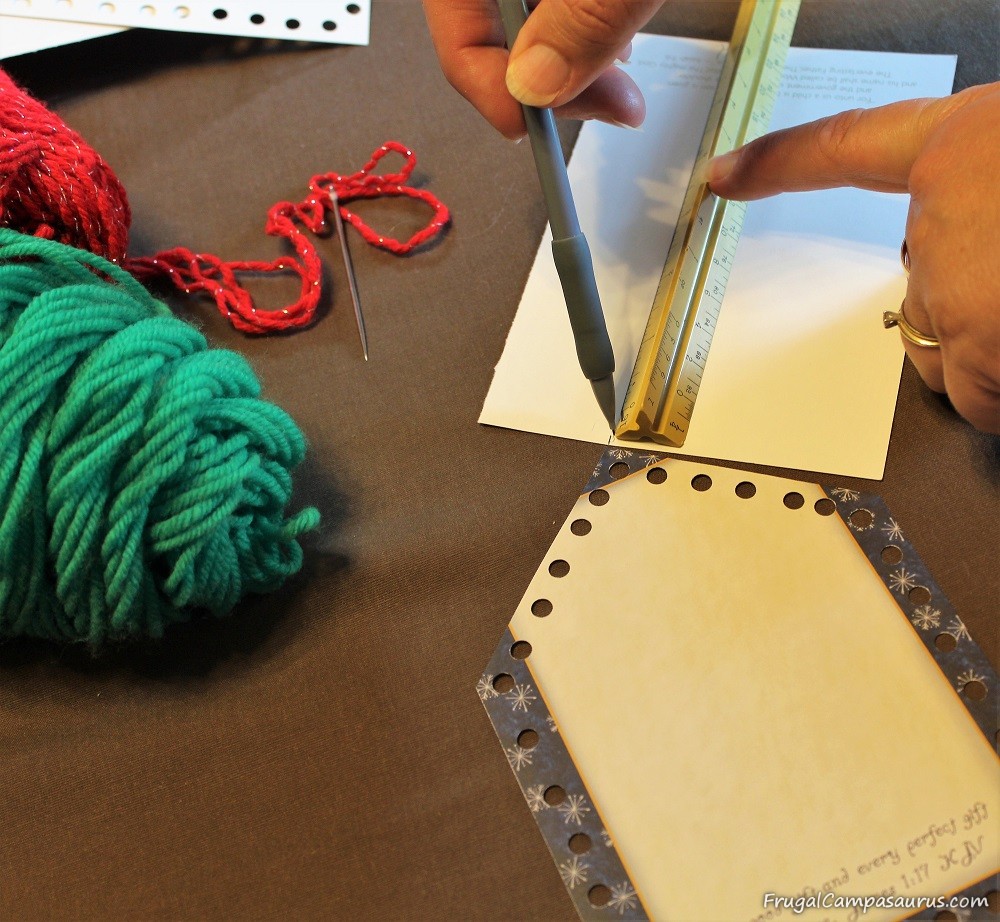
Punch holes around all the sides of the cards. It worked better to punch the corner holes first, then add the rest. I didn’t measure, just kept the punches about 1/4 of an inch away from the edge of the card.
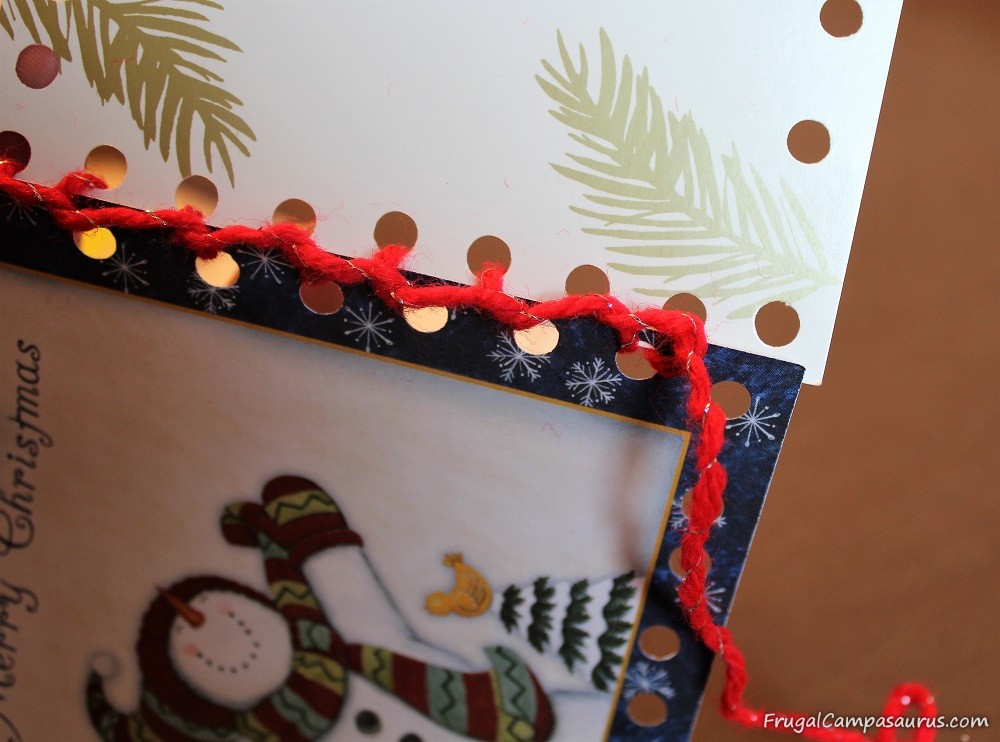
I also didn’t try to count and keep the same number of holes on each side of the cards. If there is an extra hole, just sew in one twice. As you can see above, the blanket stitch is pretty forgiving and you can”t really tell that I was off on the end stitch.
![]()
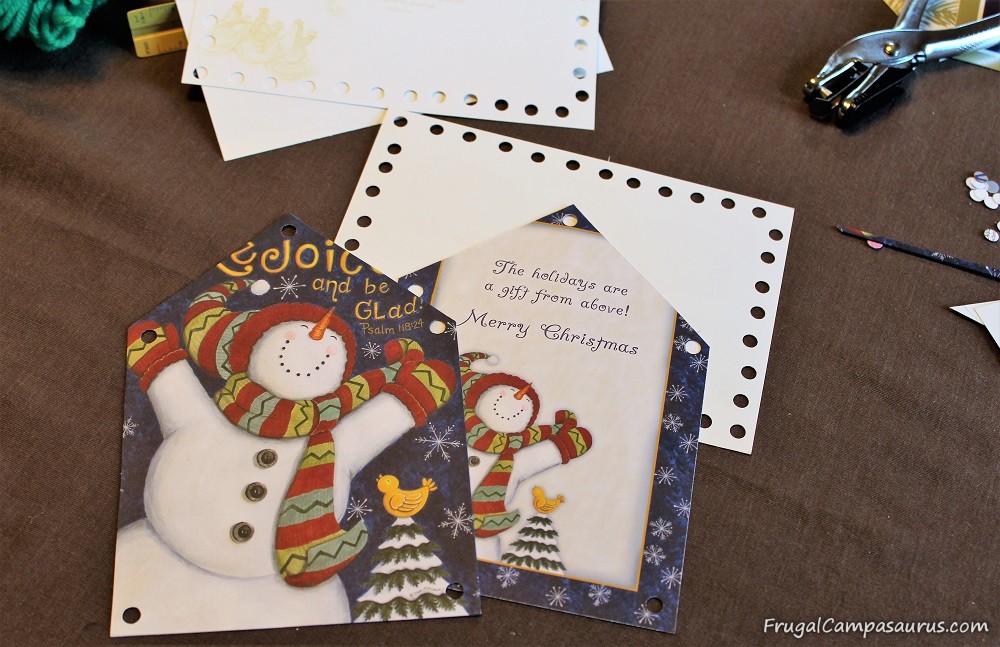
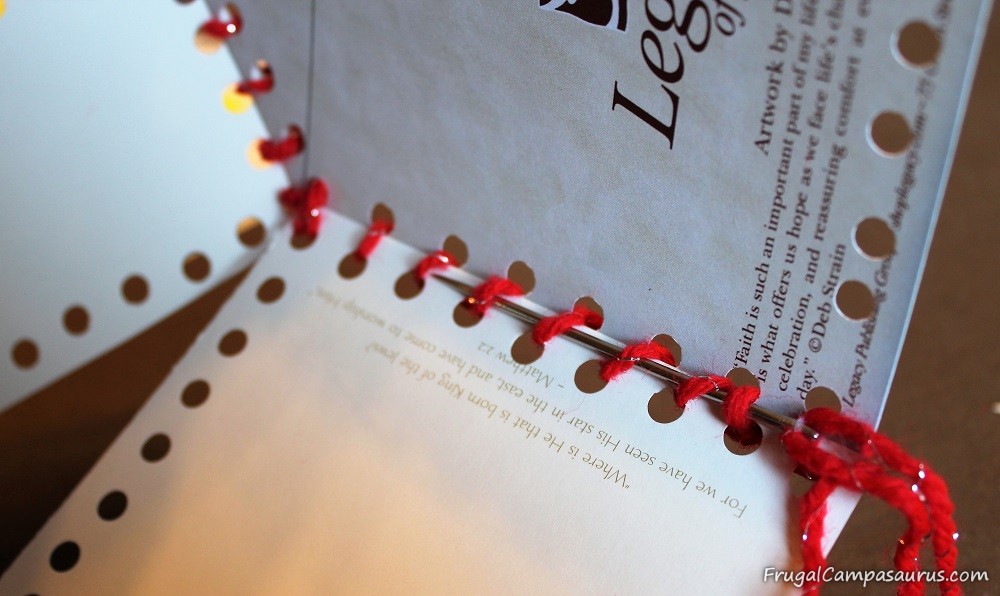
I used the blanket stitch to join the cards together and make the gift box. To start, tie on any where, then as you sew, go in the bottom or lower hole and come out the top hole. Make sure to catch the loop (it goes behind the needle to make the yarn line across the stitches) as you pull the yarn up. Then, go in the next bottom hole and come out the next top hole. Don’t make the stitches too tight or the cards won’t open and make a box.
I didn’t construct the box in any specific order, I just added whichever piece I wanted too. Make sure the card pieces are facing the right way, and not upside down or pretty side towards the inside of the box. Though it is easy to undo the stitches, and I only had to redo a few.
When I needed to join sides that I was not sewing near, I did not tie off the string and start again. It was very easy to run the string up the stitches on the inside of the gift box.
I also discovered it was easier to tie on extra string, instead of tying it off to a punched hole and then starting again. Unlike crochet, the knots really aren’t noticeable.
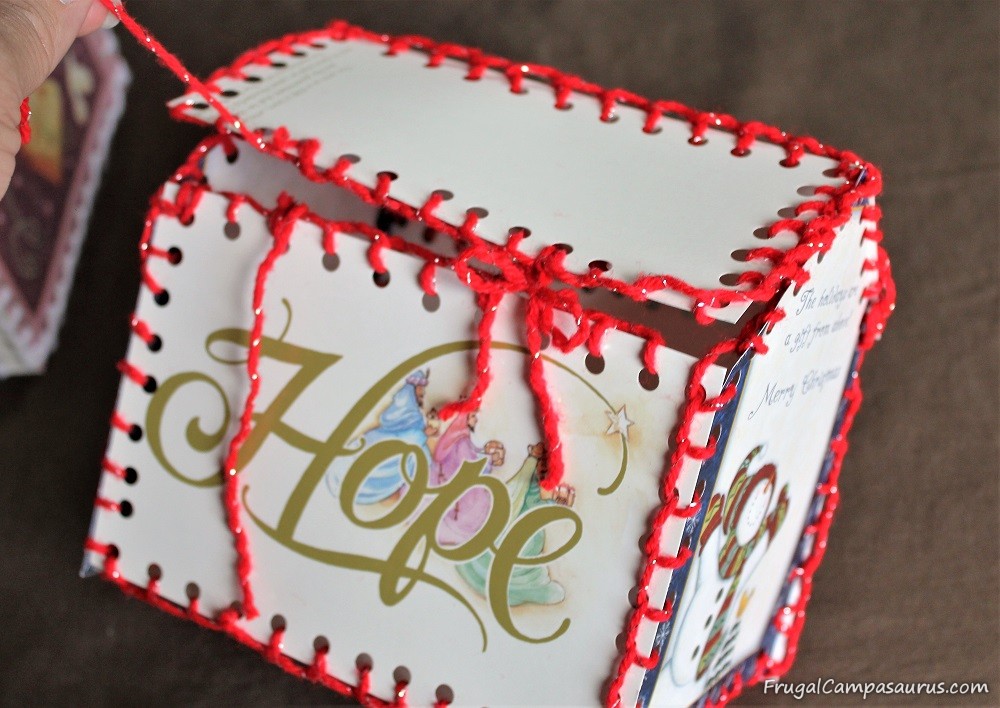
Make sure to only sew the ridge or top holes on one of the roof pieces, then do the blanket stitch around the other 3 sides for decoration. This will let you open the gift box to put in presents-do not start sewing around all of the roof and wonder what is wrong. At least stitches are easy to take out….
I tied 4 longer pieces of yarn on the open side, to tie into bows to close the present. I’m not sure this will keep the children out, unless I knot the bows or don’t label the gift boxes. I will also need to wrap the present in tissue paper, so they can’t peek into the paper punch holes.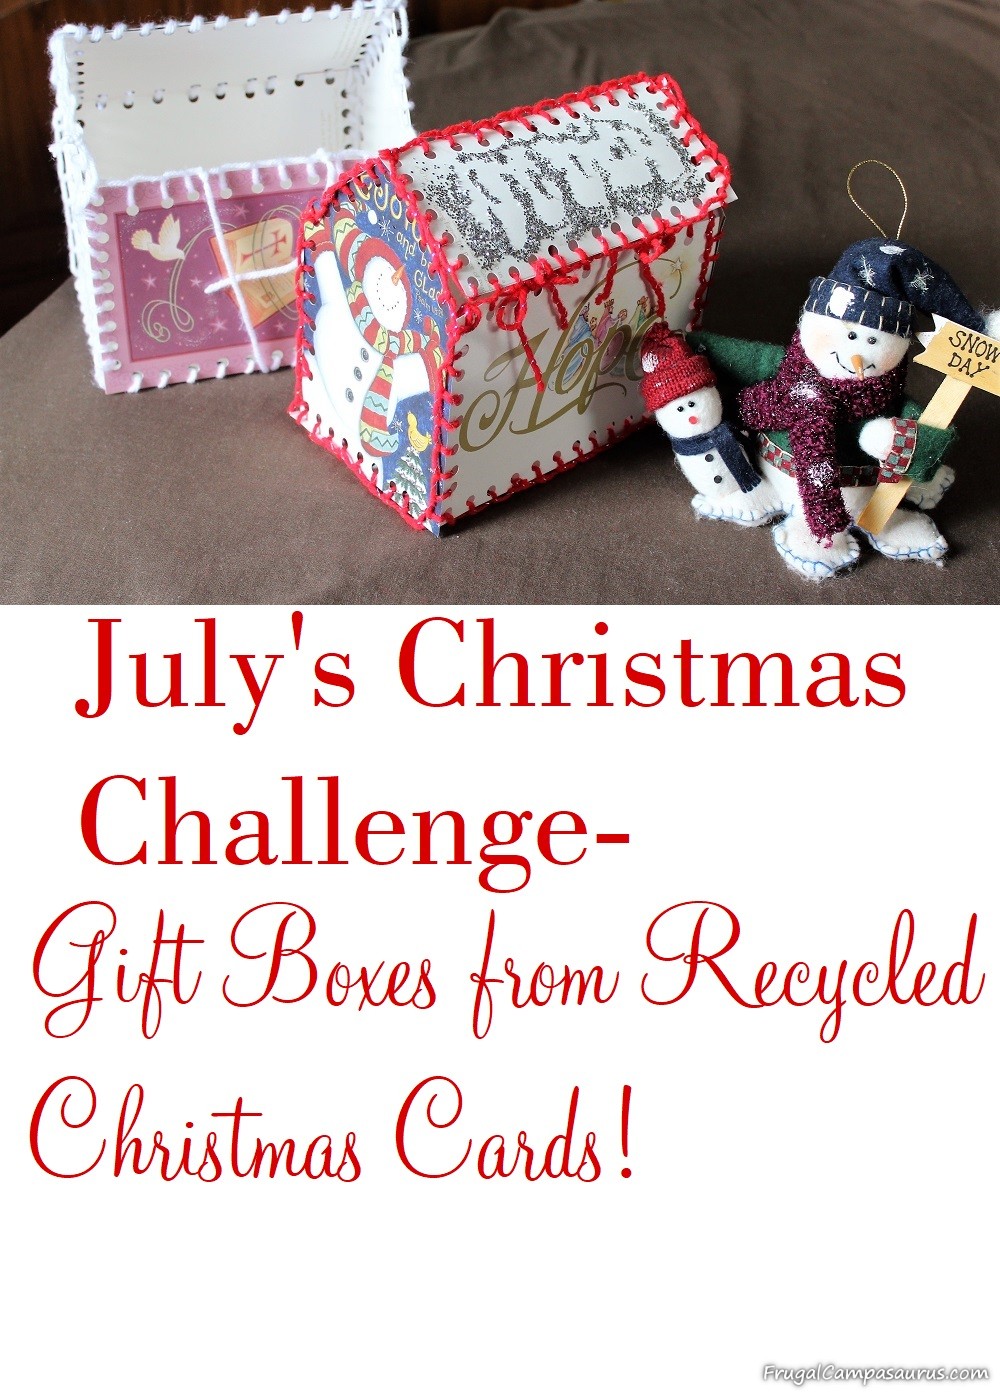
I love the finished Recycled Card Gift Boxes! They are so easy and fun to make! Now, I can add Christmas cards to my ‘to buy’ list for garage sale-ing-! It was such a Fun Friday project- and since it was the July Christmas project, I also got to use glitter!
Happy Camping ( or glittering!)
Frugal Campasaurus