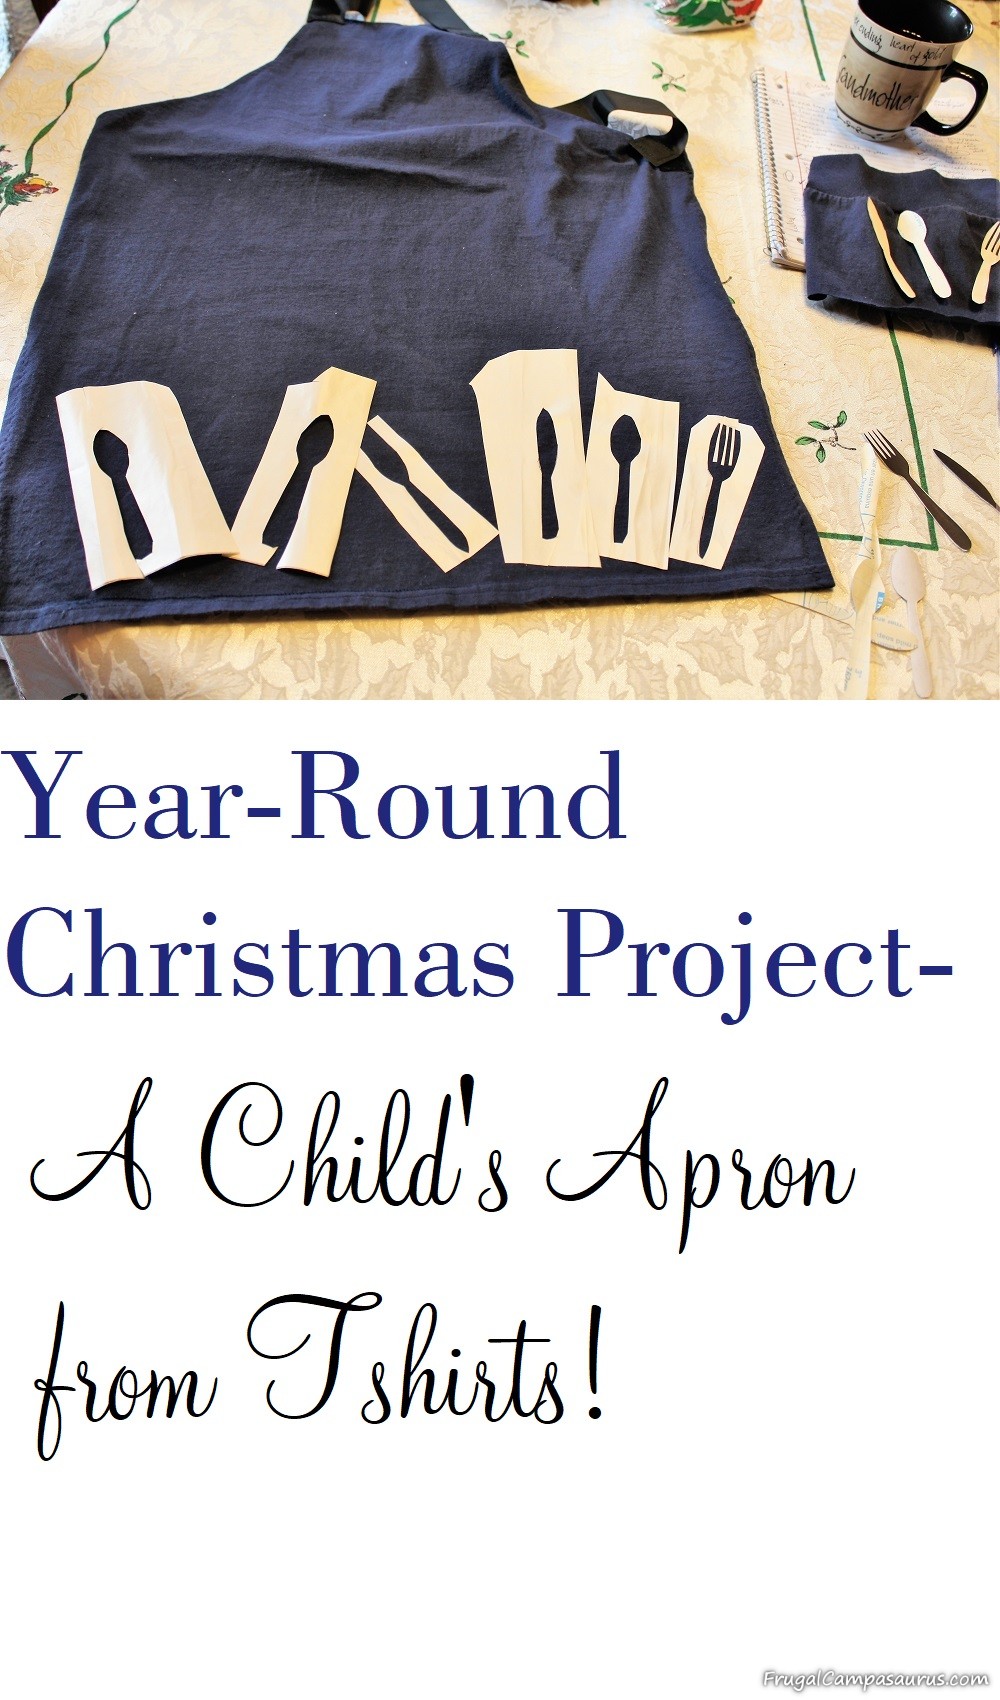
Good morning! It’s a Frugal Friday, Christmas edition day! I’m so happy to share this t-shirt apron- it is frugal, fun and part of one of my favorite Christmas presents to give. The Child’s T-shirt Apron was part of a play-food Christmas present I gave the grandbaby last year. It was so fun and frugal, I wanted to share it with you! It would be a great project to complete now, either as part of a play-food Christmas present or to give on it’s own.
Just like the Dress-up box, the play-food box is a tradition. This Christmas present is given to all children, nieces and nephews, and now the grandbaby.
It can be a big present, but I love searching garage sales and thrift stores for play-food items. Picnic baskets, play-food, toy plates, toy cups and trays are all fun to find.
Making parts of the present is also fun. One of the things I made was the t-shirt apron. Once I actually started, it was so frugal and easy to make. Like many of my sewing projects, I delayed starting. It was after Thanksgiving before I just tried to make the apron. I’m so glad I did, it turned out to be a great addition to the play-food Christmas present!
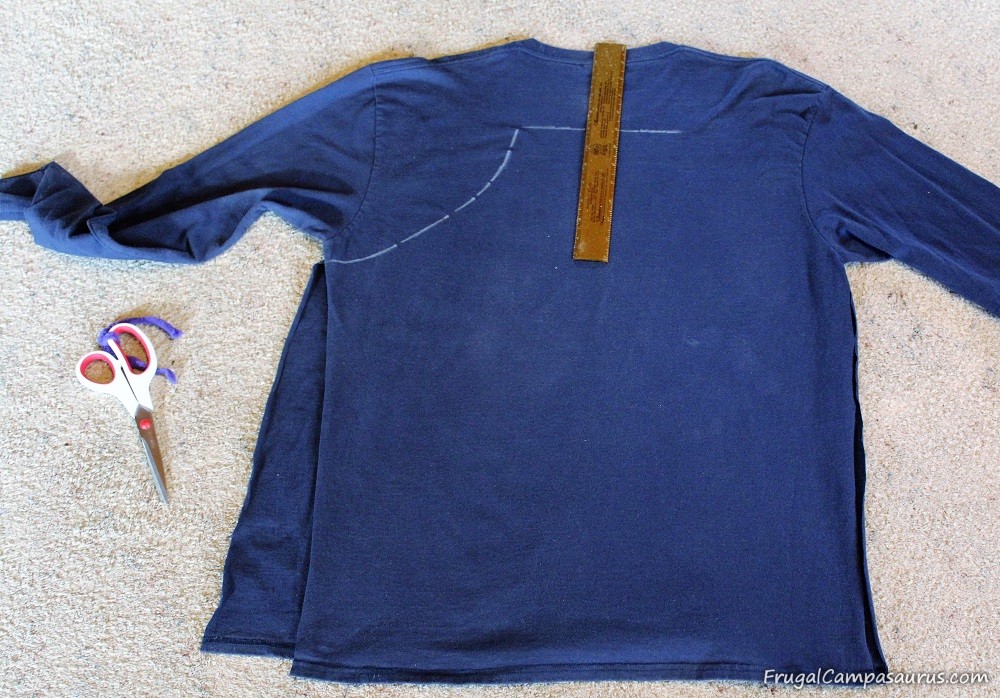
The apron was cut from the front of an adult t-shirt. The bottom hem on the shirt is the bottom hem of the apron.
The curve for the armpit goes about 6-7 below the top hem of the apron.
Since it is knit fabric and won’t fray, I turned over the edges 1/2 inch and hemmed the top, sides and armpit curve on the apron.
For knits, I use a long zig-zag stitch to give a bit of stretch.
I did hem the apron and finish the ties before I added the designs to the apron.
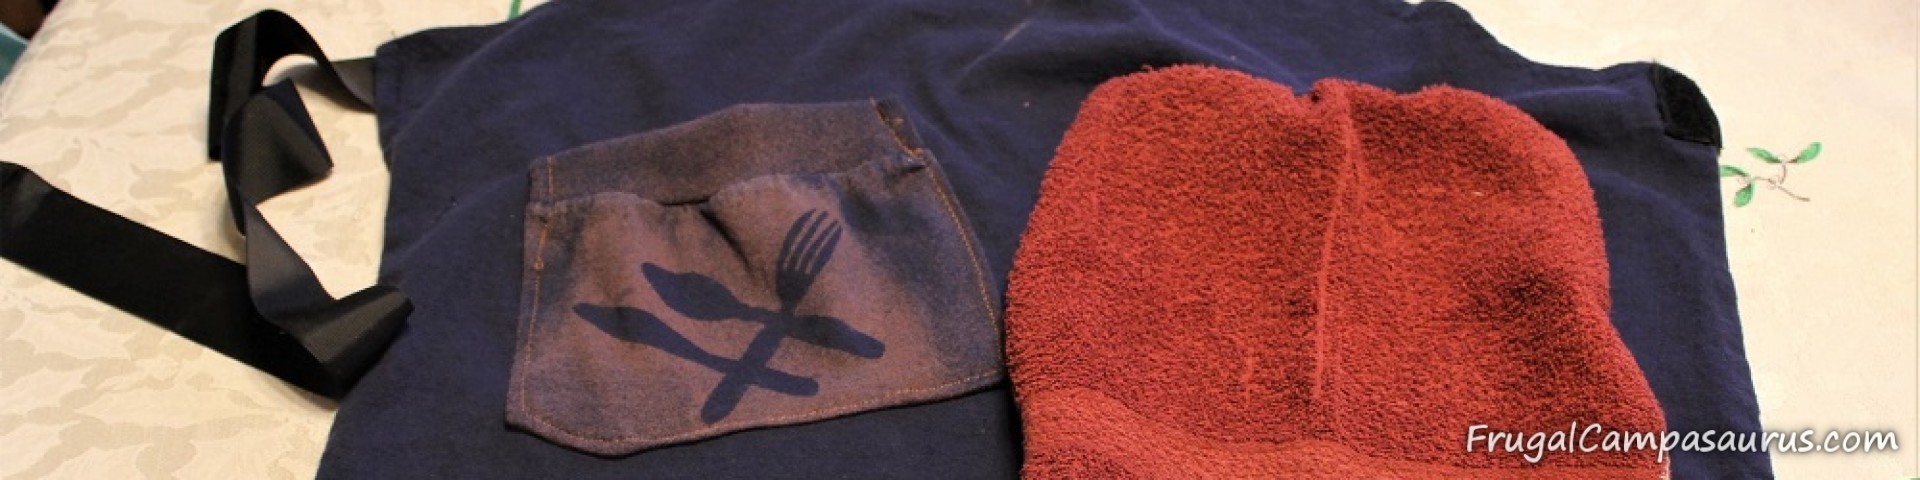
A pocket was made with the bottom 5 inches of the sleeve, using the cuff as the top edge of the pocket. I will need to sew it on after the bleach design is done.
Leftover ribbons, with velcro sewn on the ends, were easy ties. One piece was sewed on for the waist and a smaller one for behind the neck.
The grandbaby can use velcro and will not need to ask(repeatedly) for help putting on the apron .
The designs on the apron were so fun to do, I think I’m still obsessed with bleach!

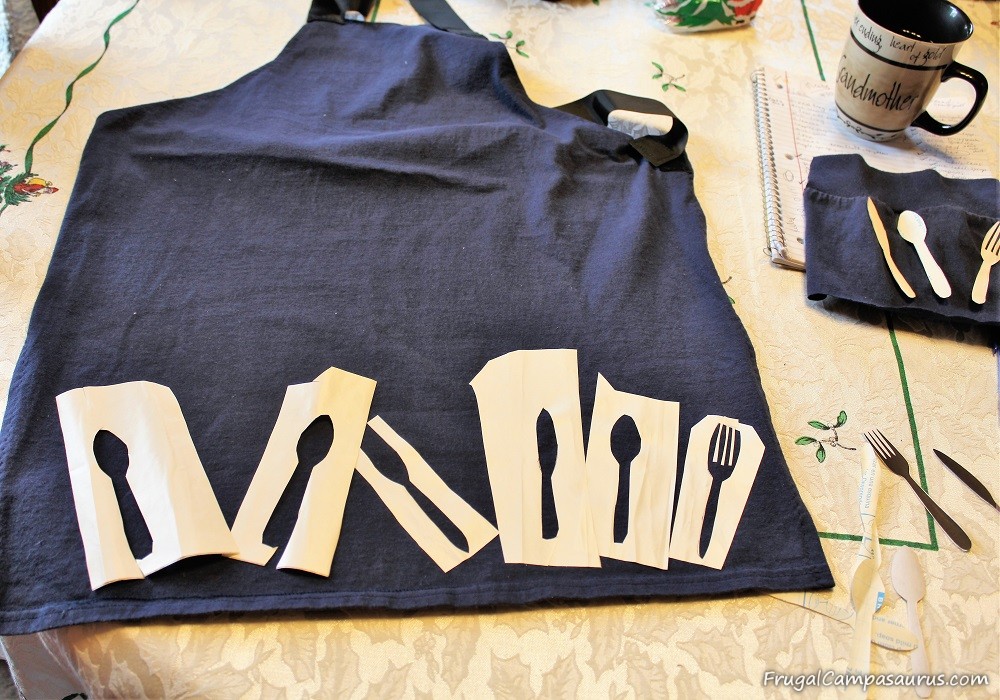
The scattered silverware, at the bottom of the apron, were to look bleached. The pocket was the opposite- a bleached background with solid silverware.
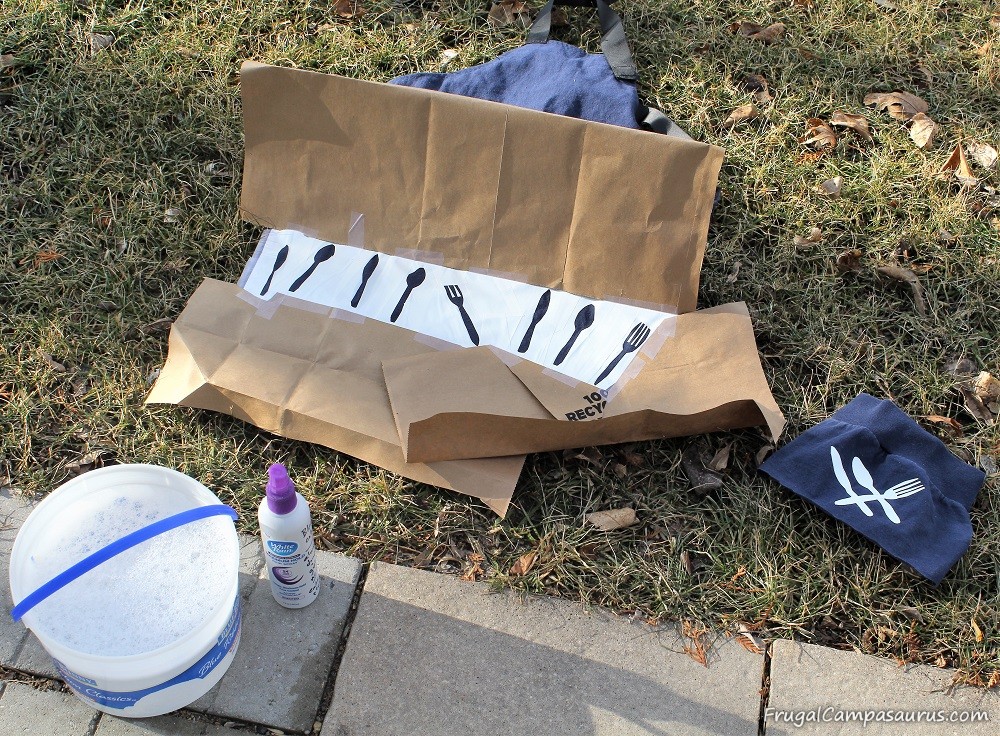
Bleaching is so quick and easy, which is why I like it so much. Even though tie-dyeing is fun, you have to wait longer for the results-and I am not patient! I used contact paper to cut out the designs, and then to cover the space in between the apron silverware. I also taped on paper bags to protect the rest of the apron from bleach over-spray.
I can’t believe I could work on this project outside-in November in Iowa! There should be snow on the ground! I could have done the project in the bathtub, but even though I miss the snow, it is easier to bleach outside.
The spray bottle ( a rinsed out hairspray bottle, marked Bleach only!!!) holds a half water and half bleach solution. I dump it out in between projects, so I don’t accidentally use it and so the bleach doesn’t ruin the sprayer’s plastic parts.
Once everything was masked off, it was quick to spray the apron and then dunk into the bucket of water. It always amazes me how quick the bleach starts to work, we are usually dunking and rinsing within about 5 minutes after spraying. I wait until I can see the fabric change color, then dunk it. Since it was cold outside, I didn’t rinse the apron with a hose. But, I did wash the it with a load of towels just in case the bleach was still on it.
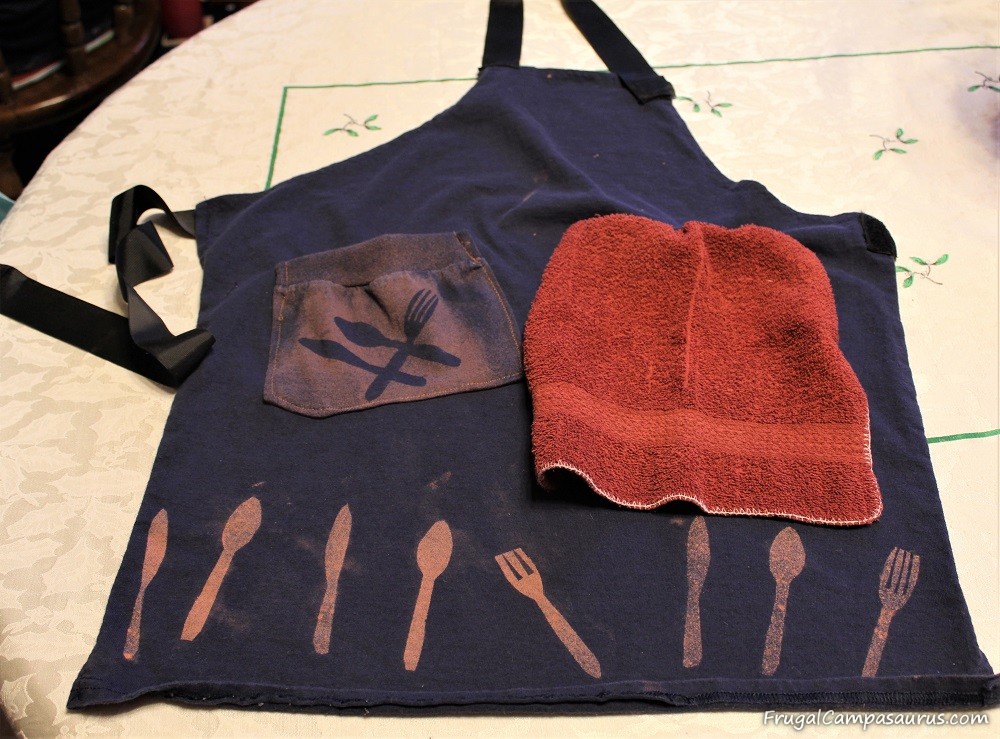
The bleached design turned out sooo great! I did get finger smudges from taking off the contact paper before rinsing the apron, next time I will dunk first! But it turned out sooo cute!
I sewed a washcloth onto the apron next to the pocket for the grandbaby. The grandbaby always chooses an apron with a towel sewed on, when we bake at my house. That apron was my mother-in-laws, and it makes me smile that grandbaby likes it, so I wanted a towel on this apron also.
The Child’s T-Shirt Apron was a fun, frugal edition to the Christmas play-food present. Even though I waited until November, I’m glad I made it. It was so fun- maybe the older nieces and nephews need bleach aprons for Christmas this year! Hopefully, you can get an early start on making your Christmas (or even birthday) presents with this easy project!
Happy Camping ( or back to bleaching!)
Frugal Campasaurus